| 页面 | Scheme Target | Preview是否成功 |
|---|---|---|
| 空白View | App | 失败 |
| 空白View | Package | 成功 |
| 空白View + import Core | Package | 成功 |
| 空白View + import Core + 调用Font | Package | 失败 |
定位到时Common中Core的错误
第二步:分析解决问题
分析Common中Product:Core依赖没有真正引入。
故拆分Common为四个Product,直接对外暴露,解决了Preview无法运行的问题。
1 | import PackageDescription |
有两个细节要调整:
- 全局Package移除
type: .dynamic,让SPM决定使用什么类型。 - Fork
ProgressHUD, 移除type: .static。并在CommonPackage.swift中引用fork
1 | // .package(url: "https://github.com/relatedcode/ProgressHUD.git", from: "13.7.2") |
为什么改为静态库?
静态库可以避免Core引用的重复的问题。
1 | Showing Recent Messages |
第三步:解决跨Package引用资源文件的问题
SwiftUI Preview 位置特殊处理
由于Preview特殊机制,实际上Bundle(for: BundleFinder.**self**).resourceURL,位置在 /Users/will/Library/Developer/Xcode/DerivedData/App-gvnjpztkrklpjvfegxsksaoxjaaf/Build/Intermediates.noindex/Previews/Onboarding/Products/Debug-iphonesimulator/PackageFrameworks/Onboarding_-570F2A58E471CBF3_PackageProduct.framework
需要往上跳两级目录。故在AppCommomsBundle 的Bundle备选中添加SwiftUI Preview目录即可。
1 | private class BundleFinder {} |
使用Bundle.module
还有一种更简单的方案就是用Apple推荐的Bundle.module,也是Rswift使用的public let R = _R(bundle: Bundle.module)。
Access a resource in codein page link
Always useBundle.modulewhen you access resources. A package shouldn’t make assumptions about the exact location of a resource.
具体原因见Xcode Build生成的资源文件:
1 | import class Foundation.Bundle |
参考文章
]]>| 页面 | ]]>
|---|

 官网:
官网: 官网:
官网:
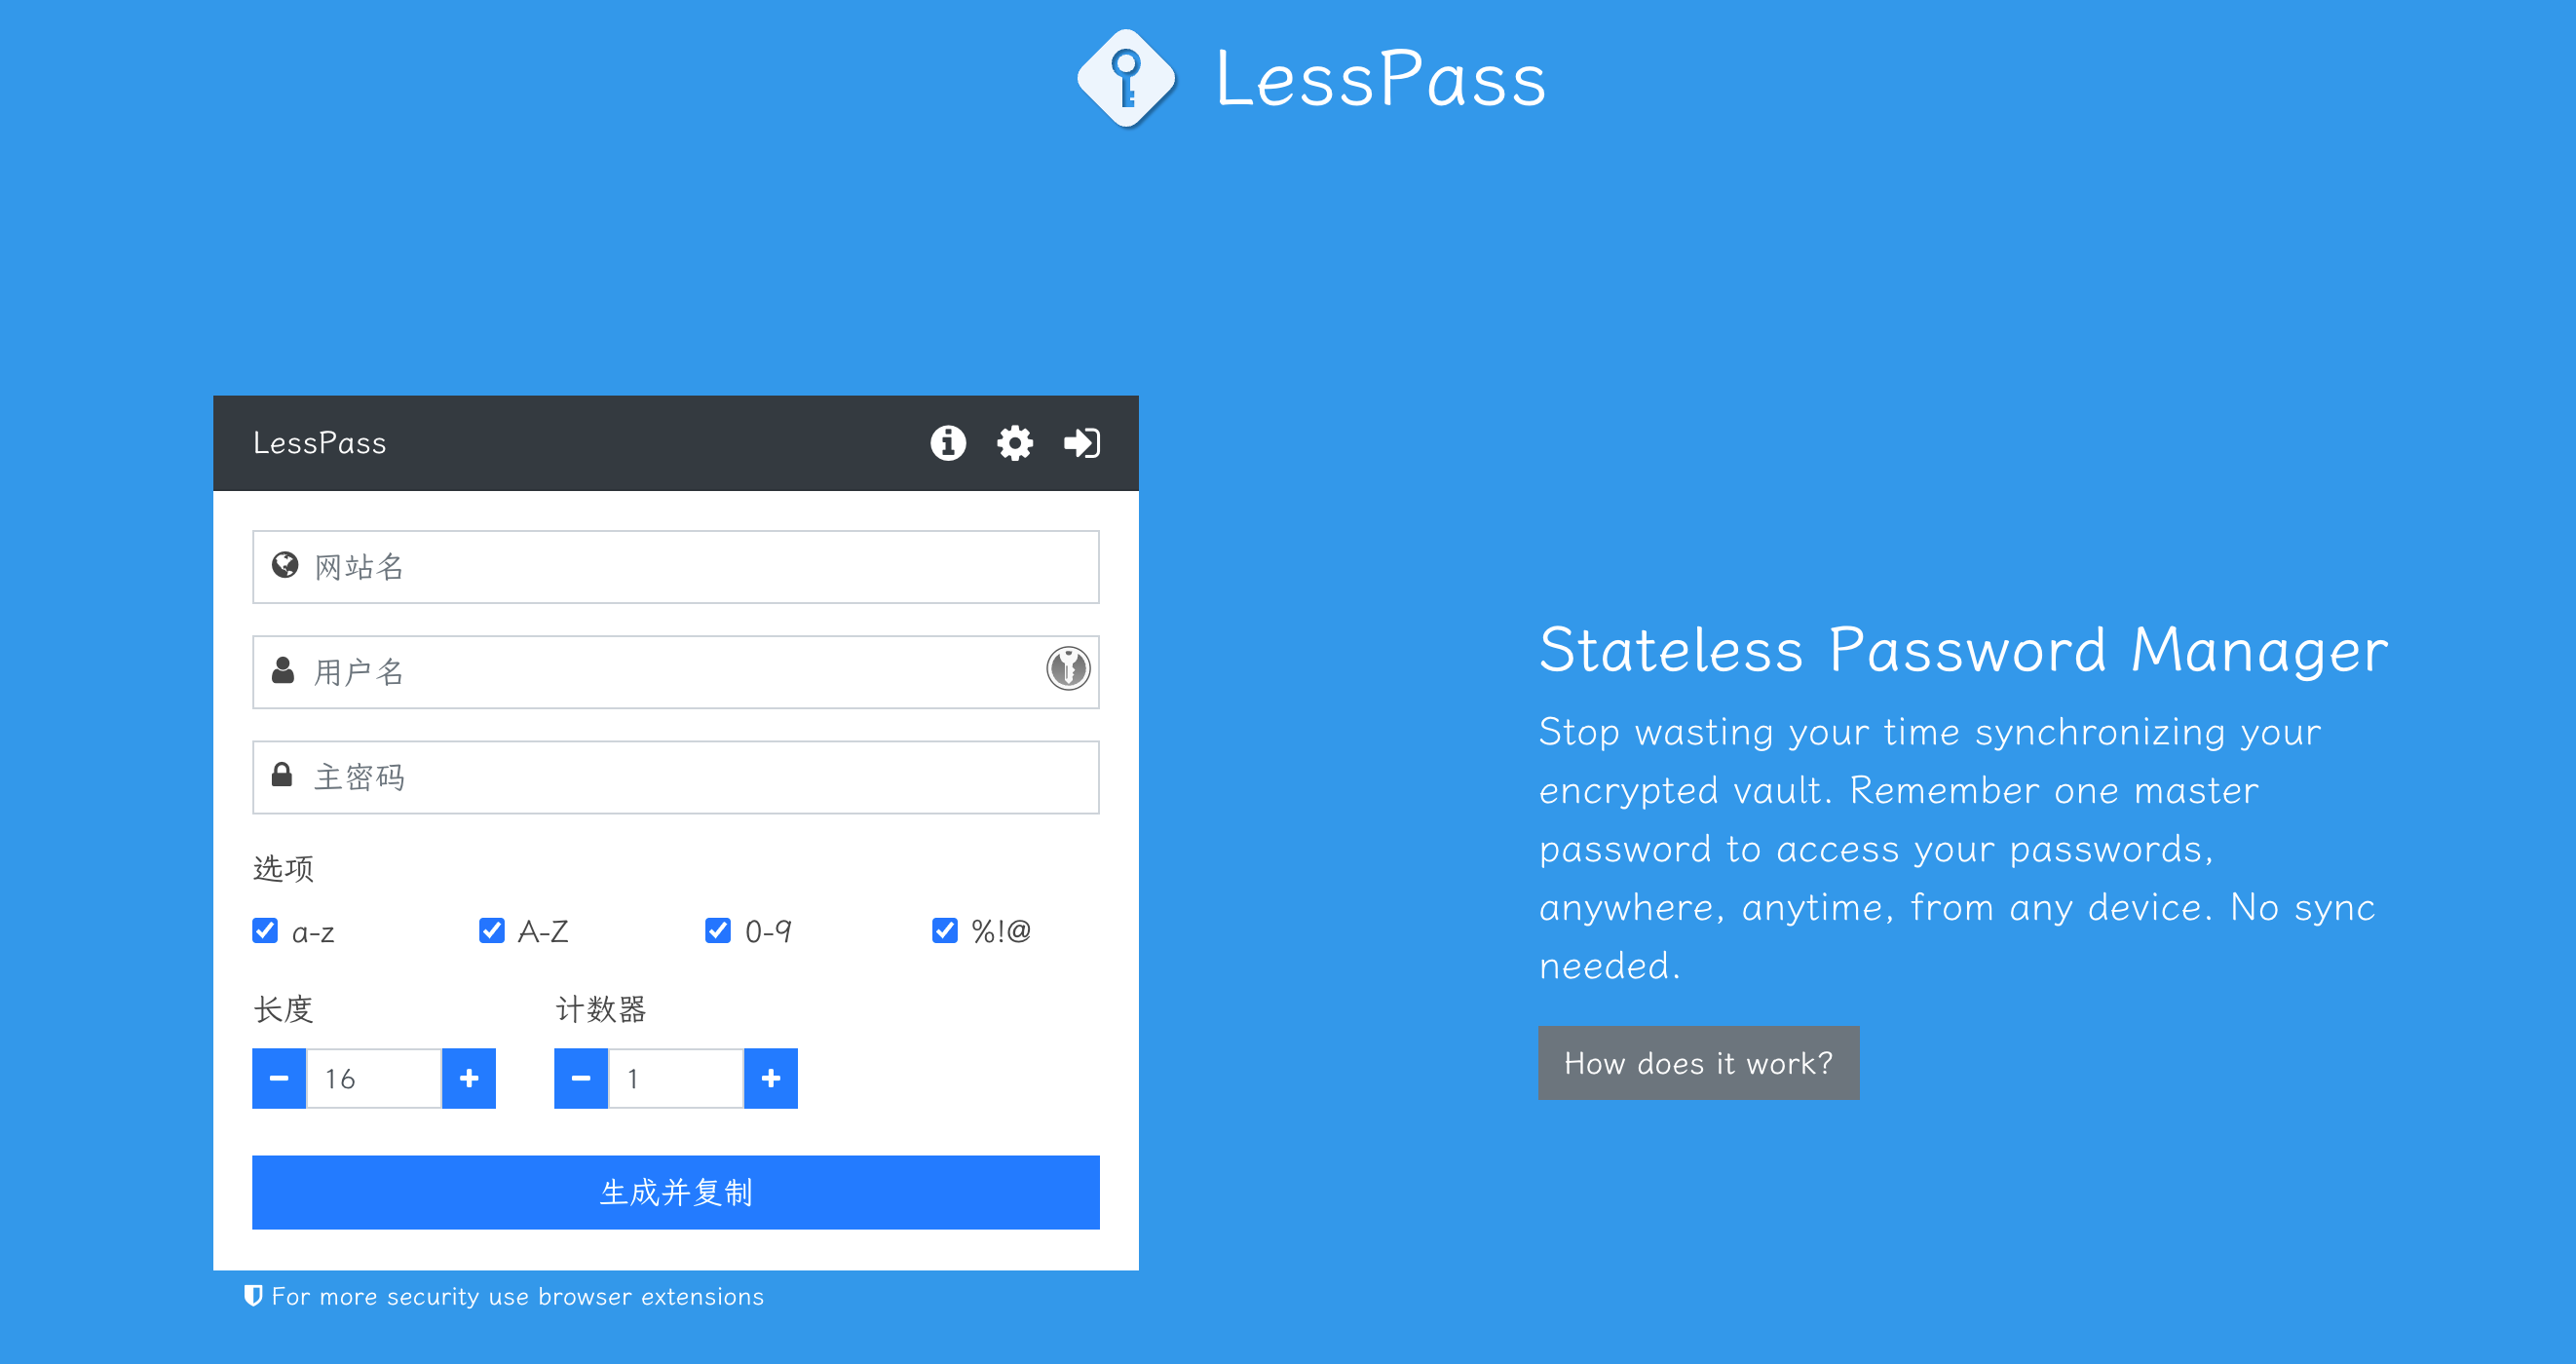
1 | secret = encrypt(key, plain); // 加密 |
1 | plain = decrypt(key, secret); // 解密 |
1 | key = Hash(password, salt); // 密钥长度不够,加密来凑 |
参考
]]>1Pass]]>
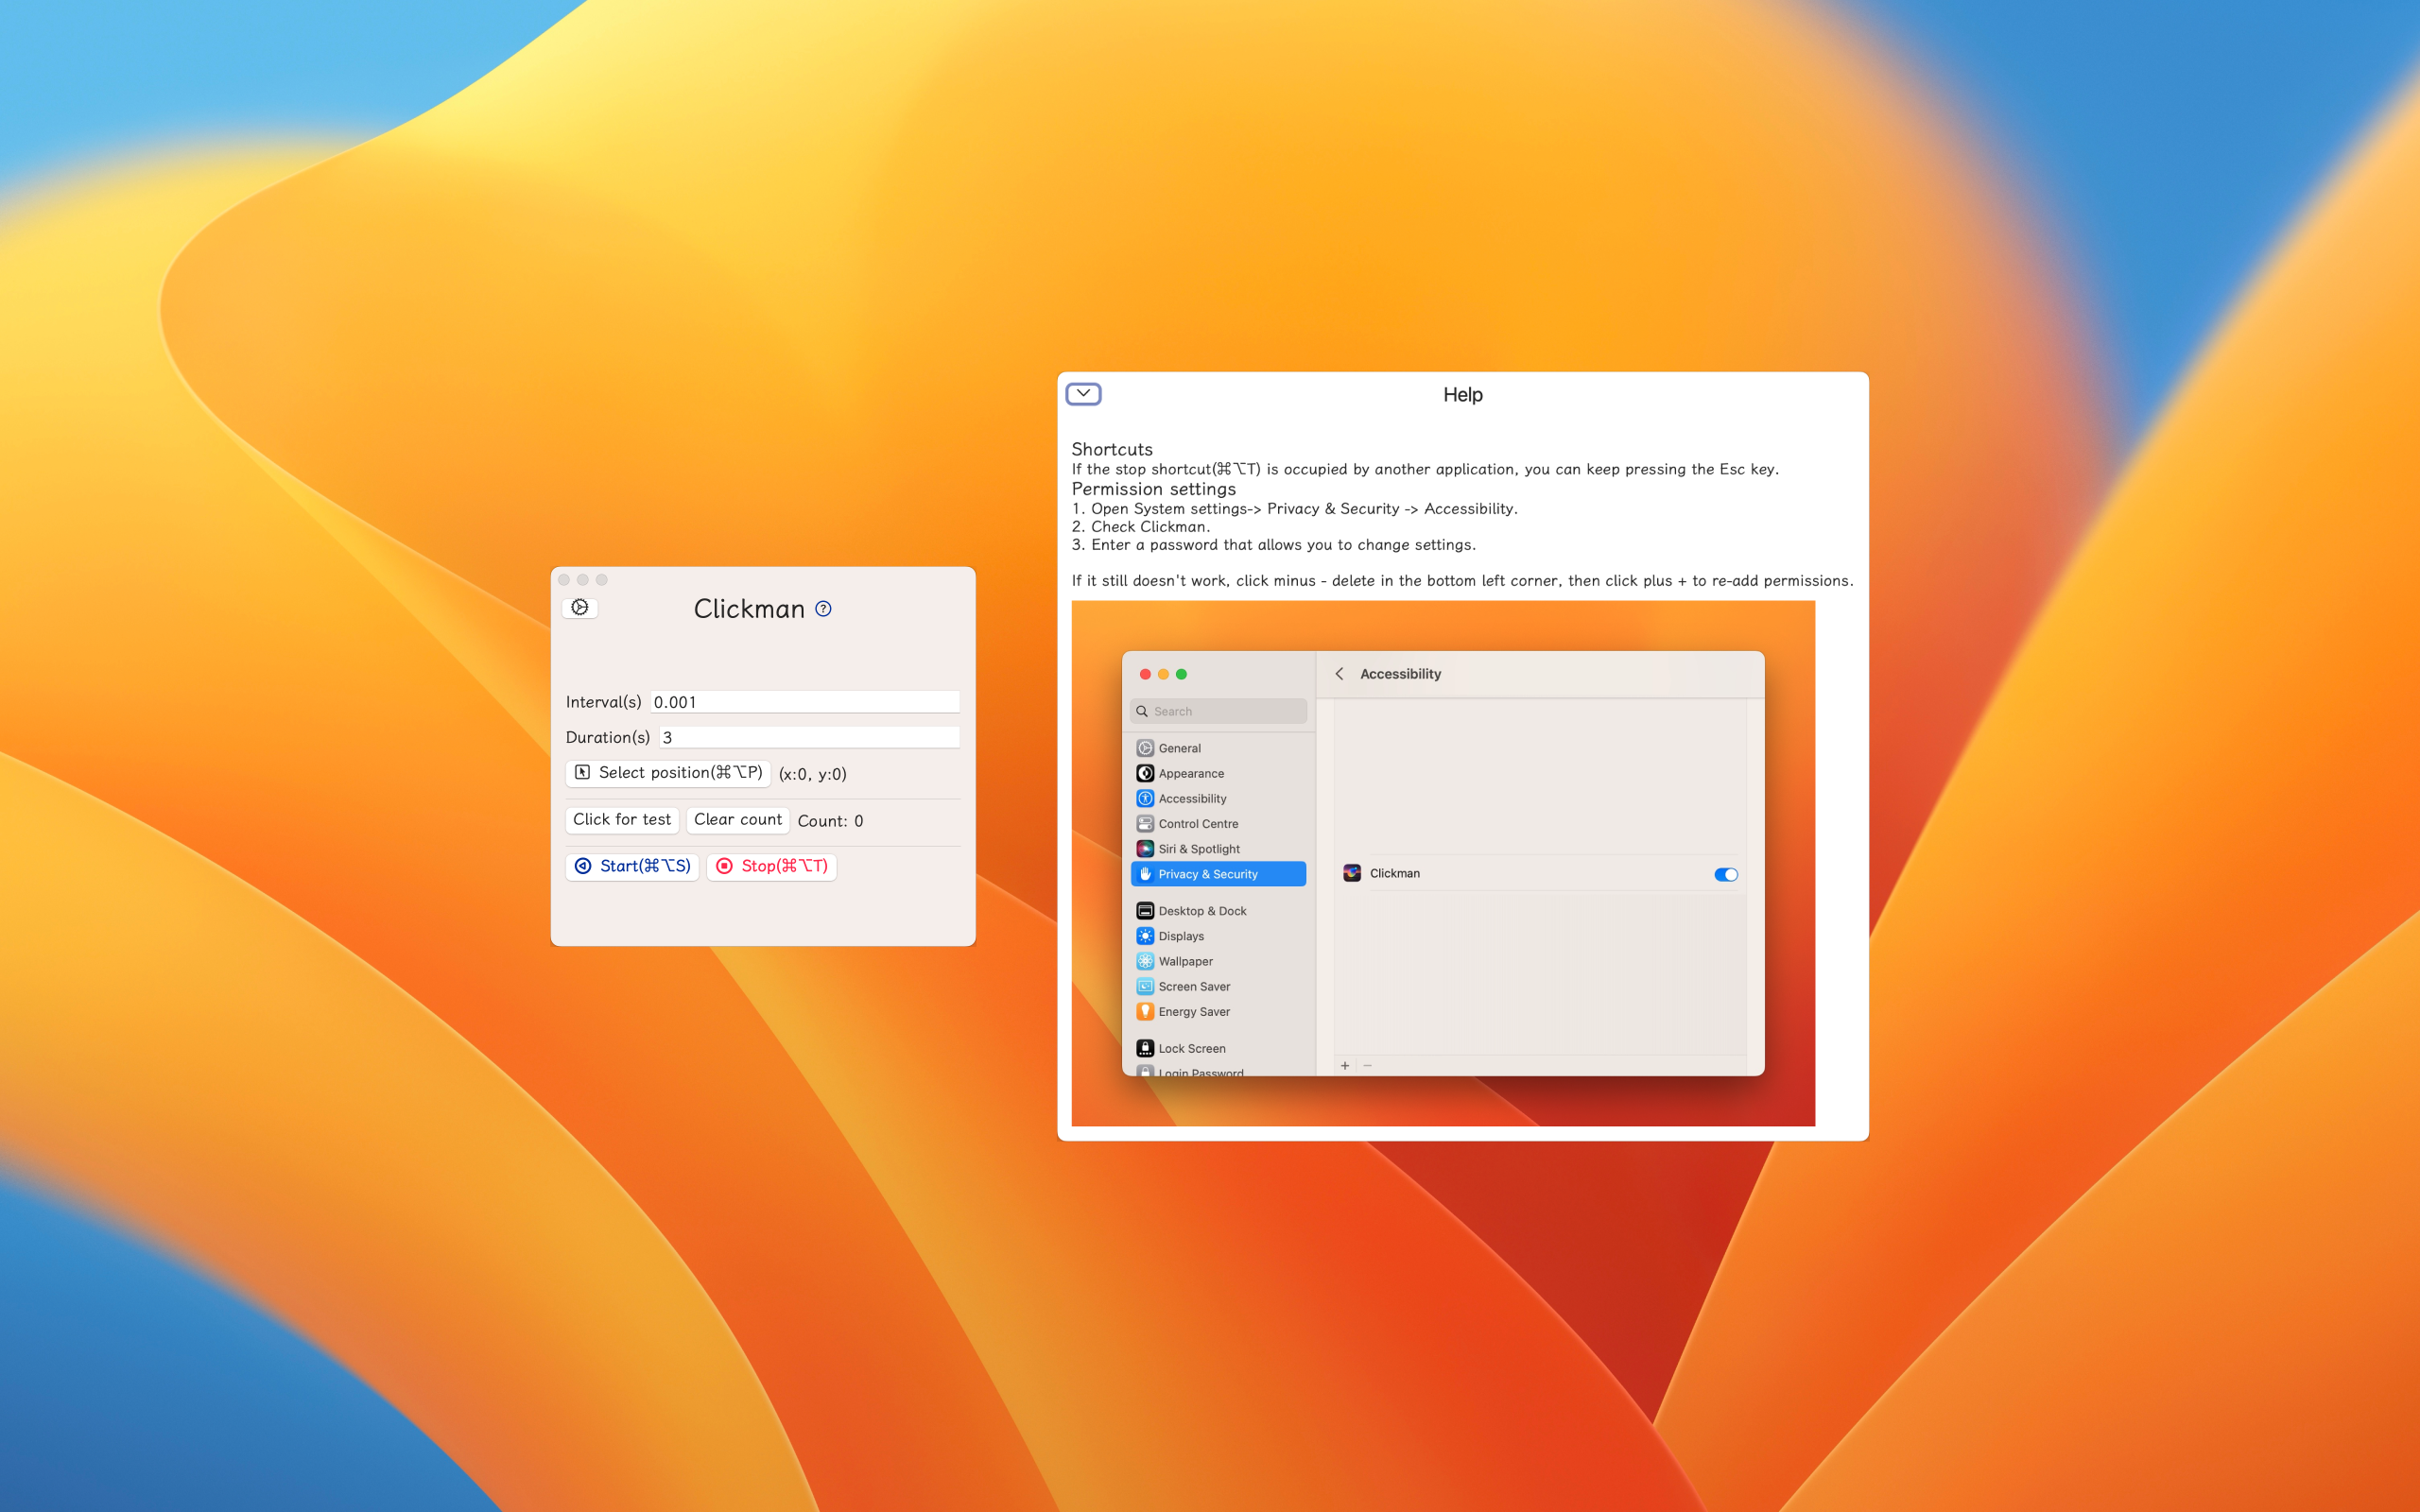
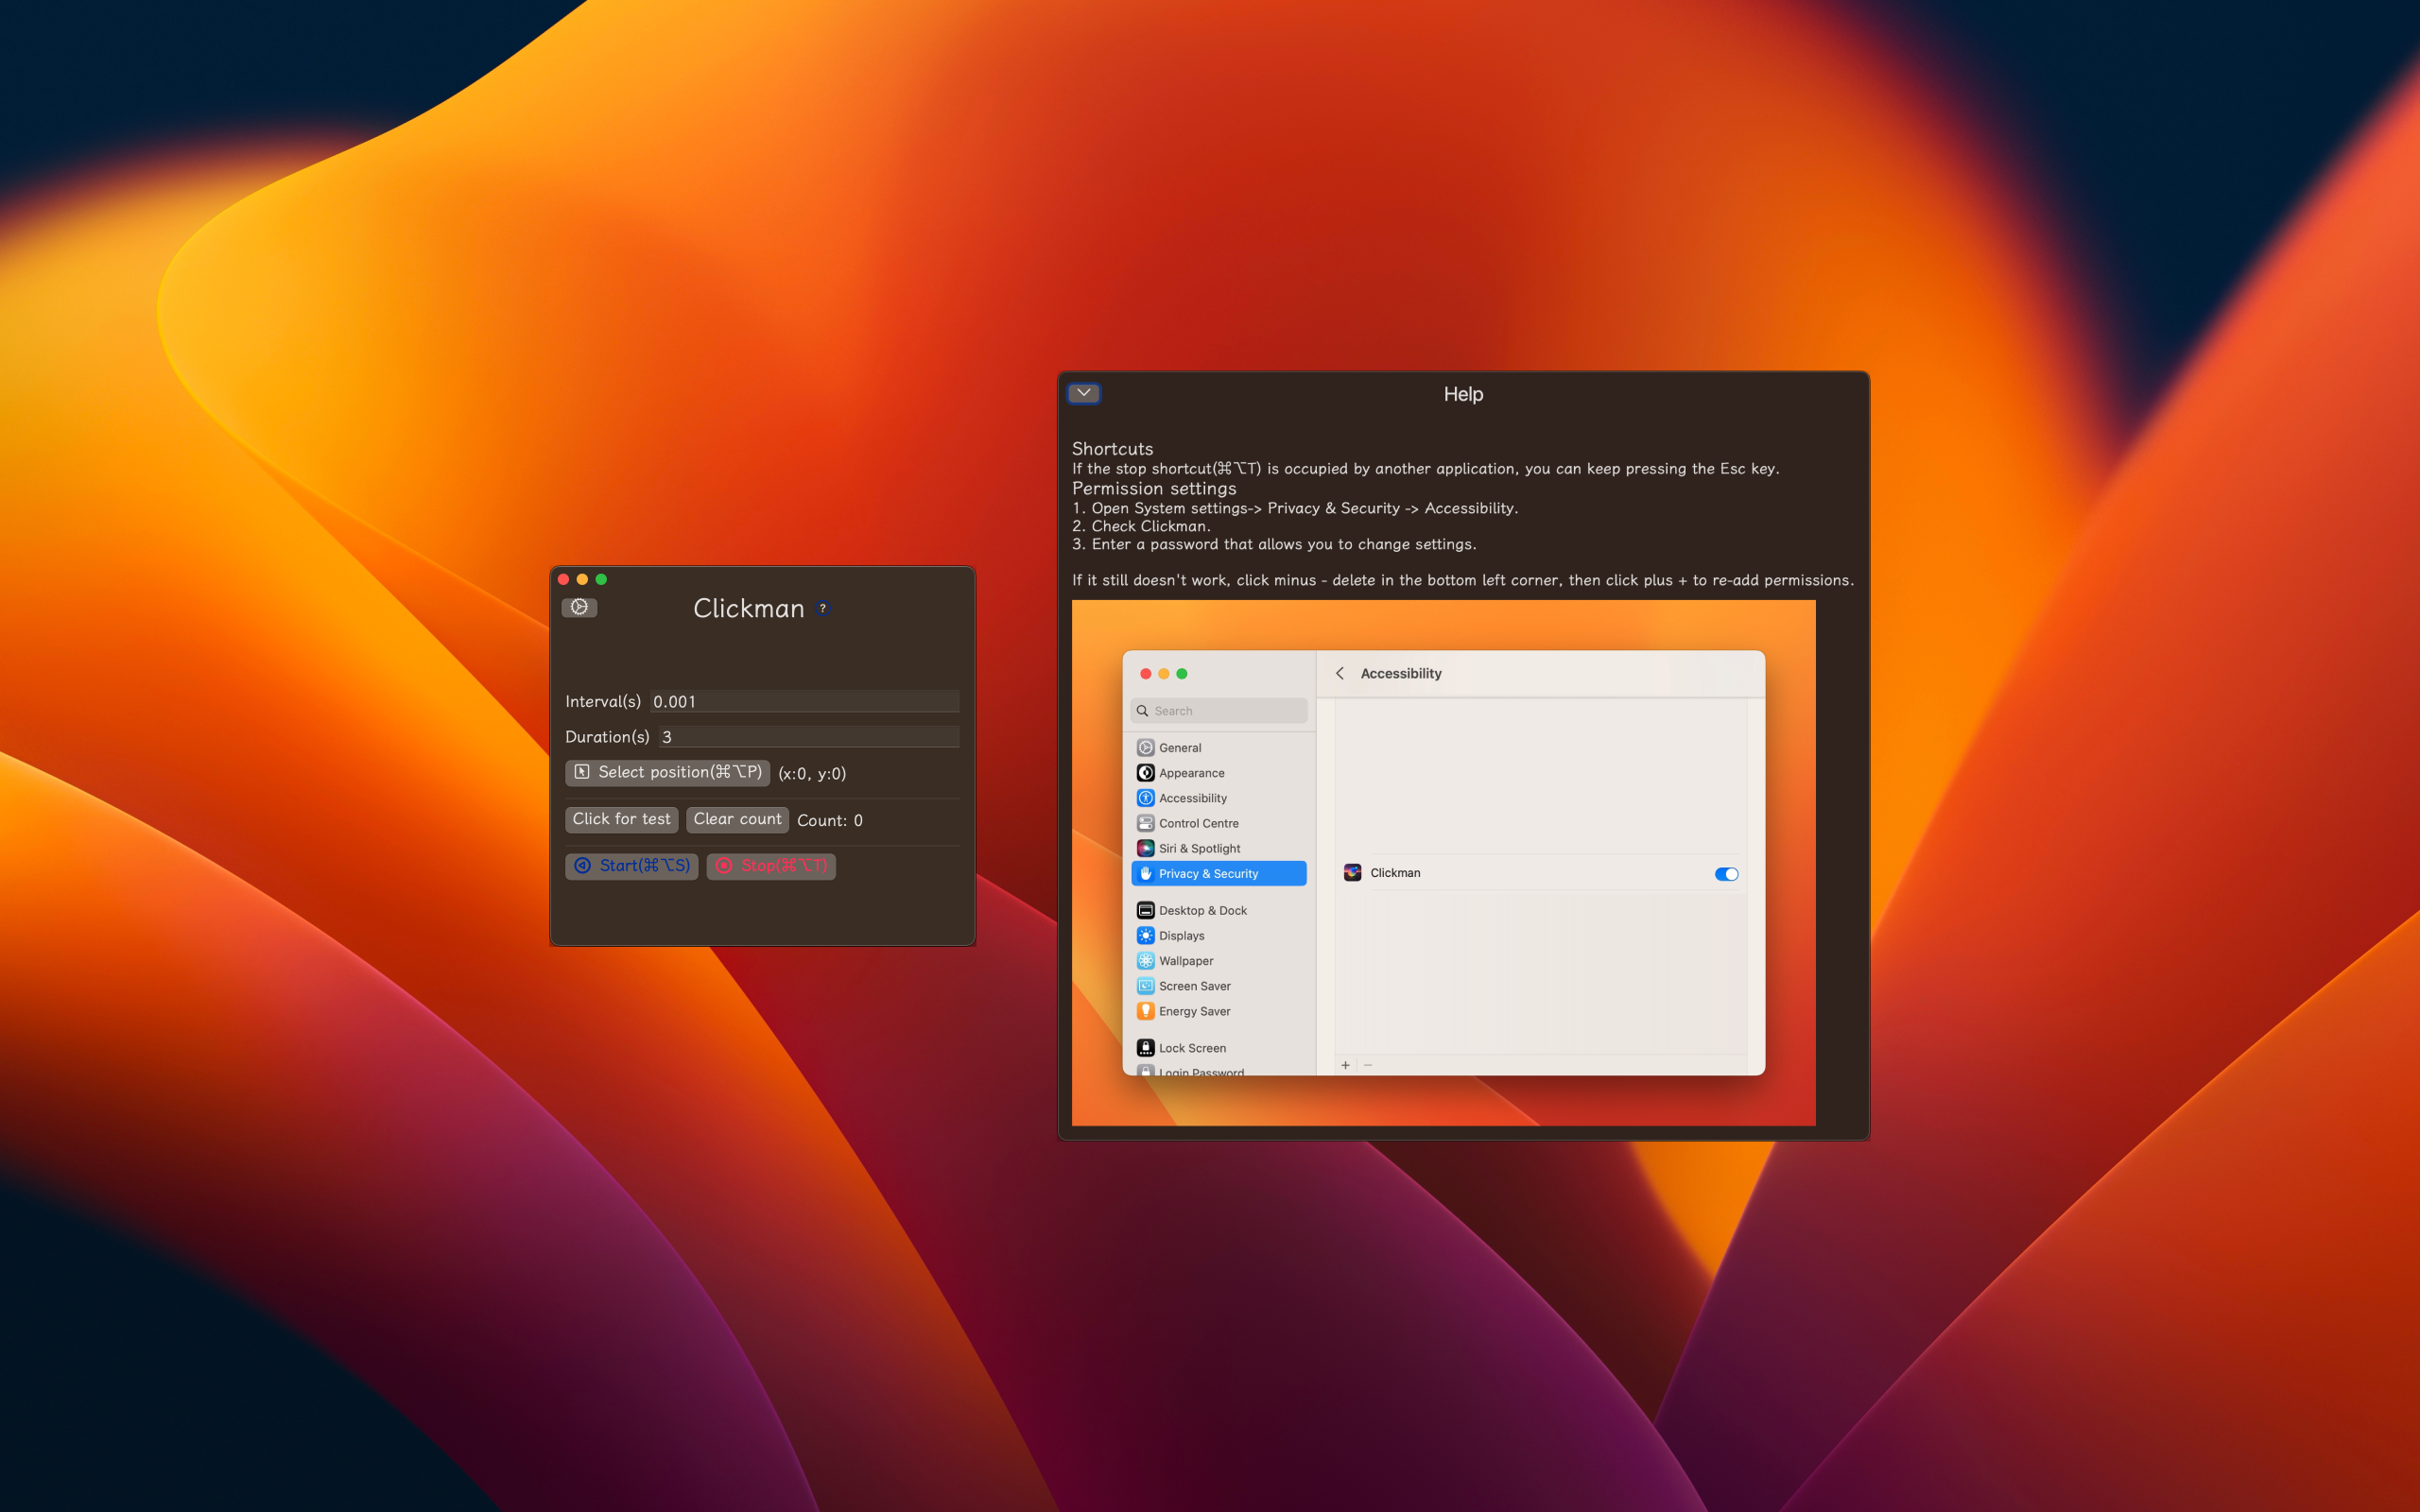
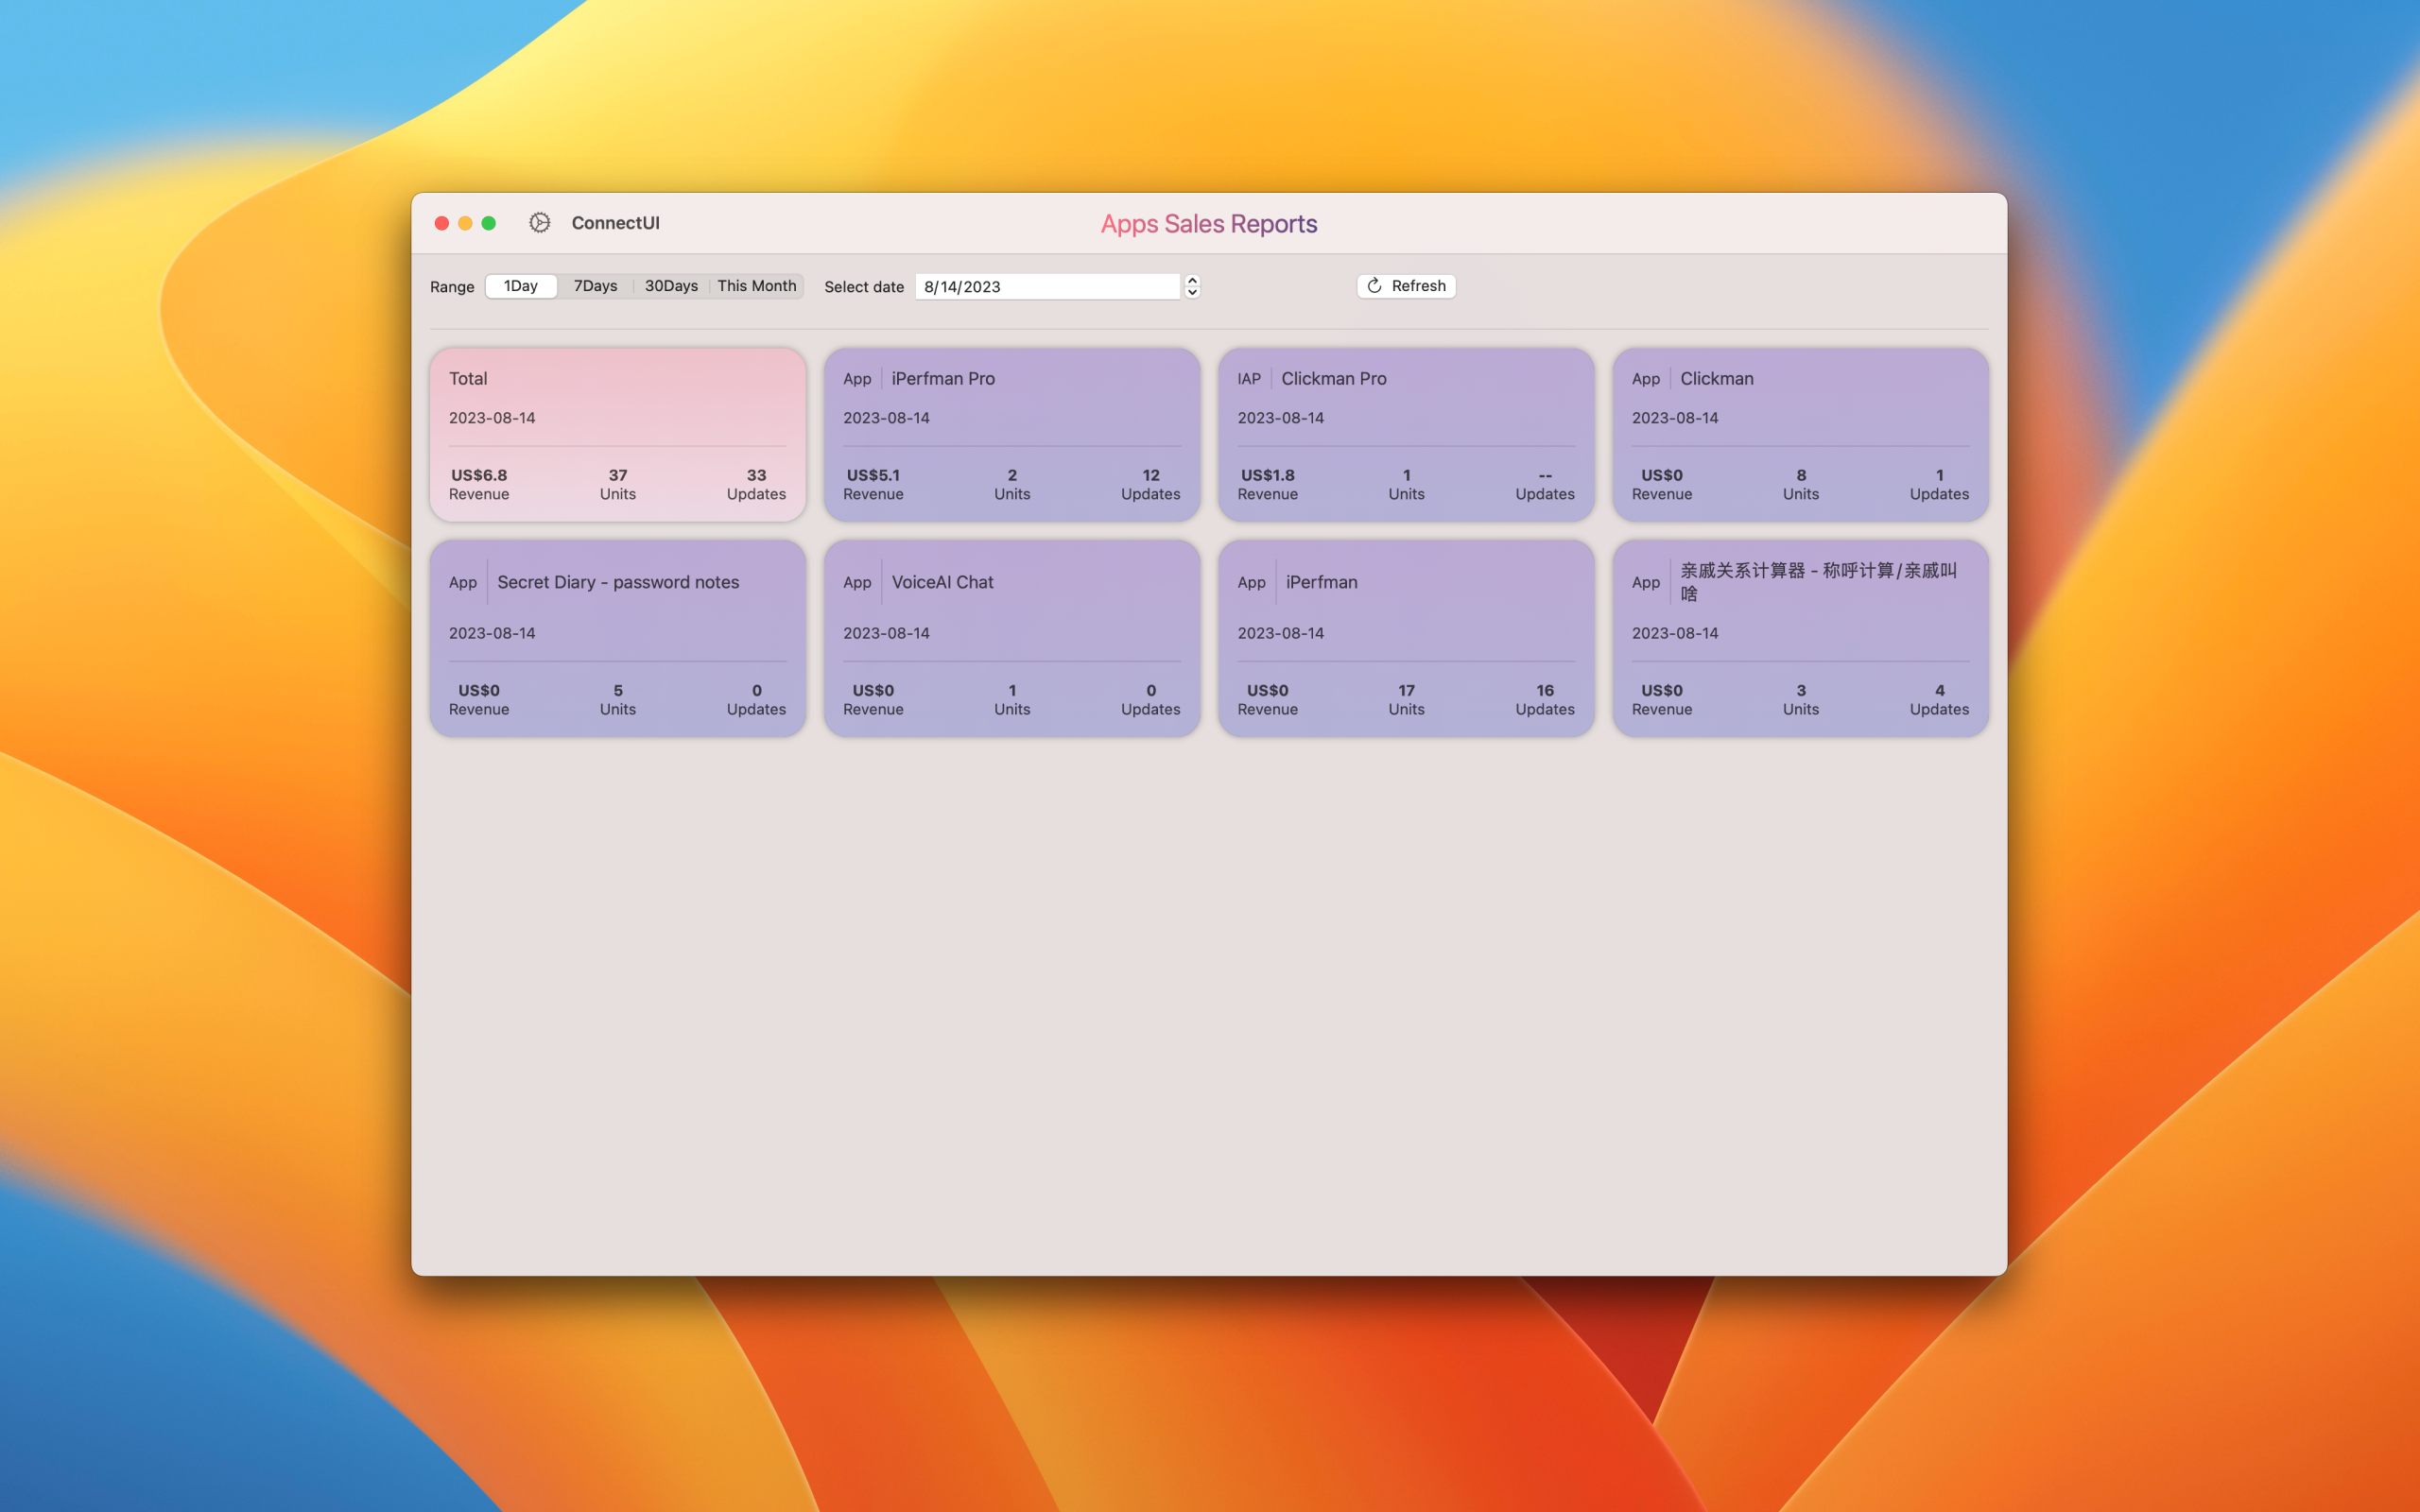
Clickman is a small and practical auxiliary tool software.
It can automatically click the left mouse button at the set time interval to achieve the effect of automatic consecutive clicks.
Up to about 110 clicks per second.
The main application scenarios are as follows:
Automatically repeat clicking skills in online games. Especially for clicking-type air combat or tower defense games, repeat clicking attacks to achieve higher damage output.
Webpage auto-refresh or scroll. By setting a proper click interval and location, achieve the effect of the mouse automatically scrolling up and down the webpage, equivalent to manually dragging the mouse scroll wheel.
For any questions or suggestions, please feel free to contact us via email at 531sunlight@gmail.com.
Download Clickman on the App Store
Privacy policy
This App does not collect or upload any private information.
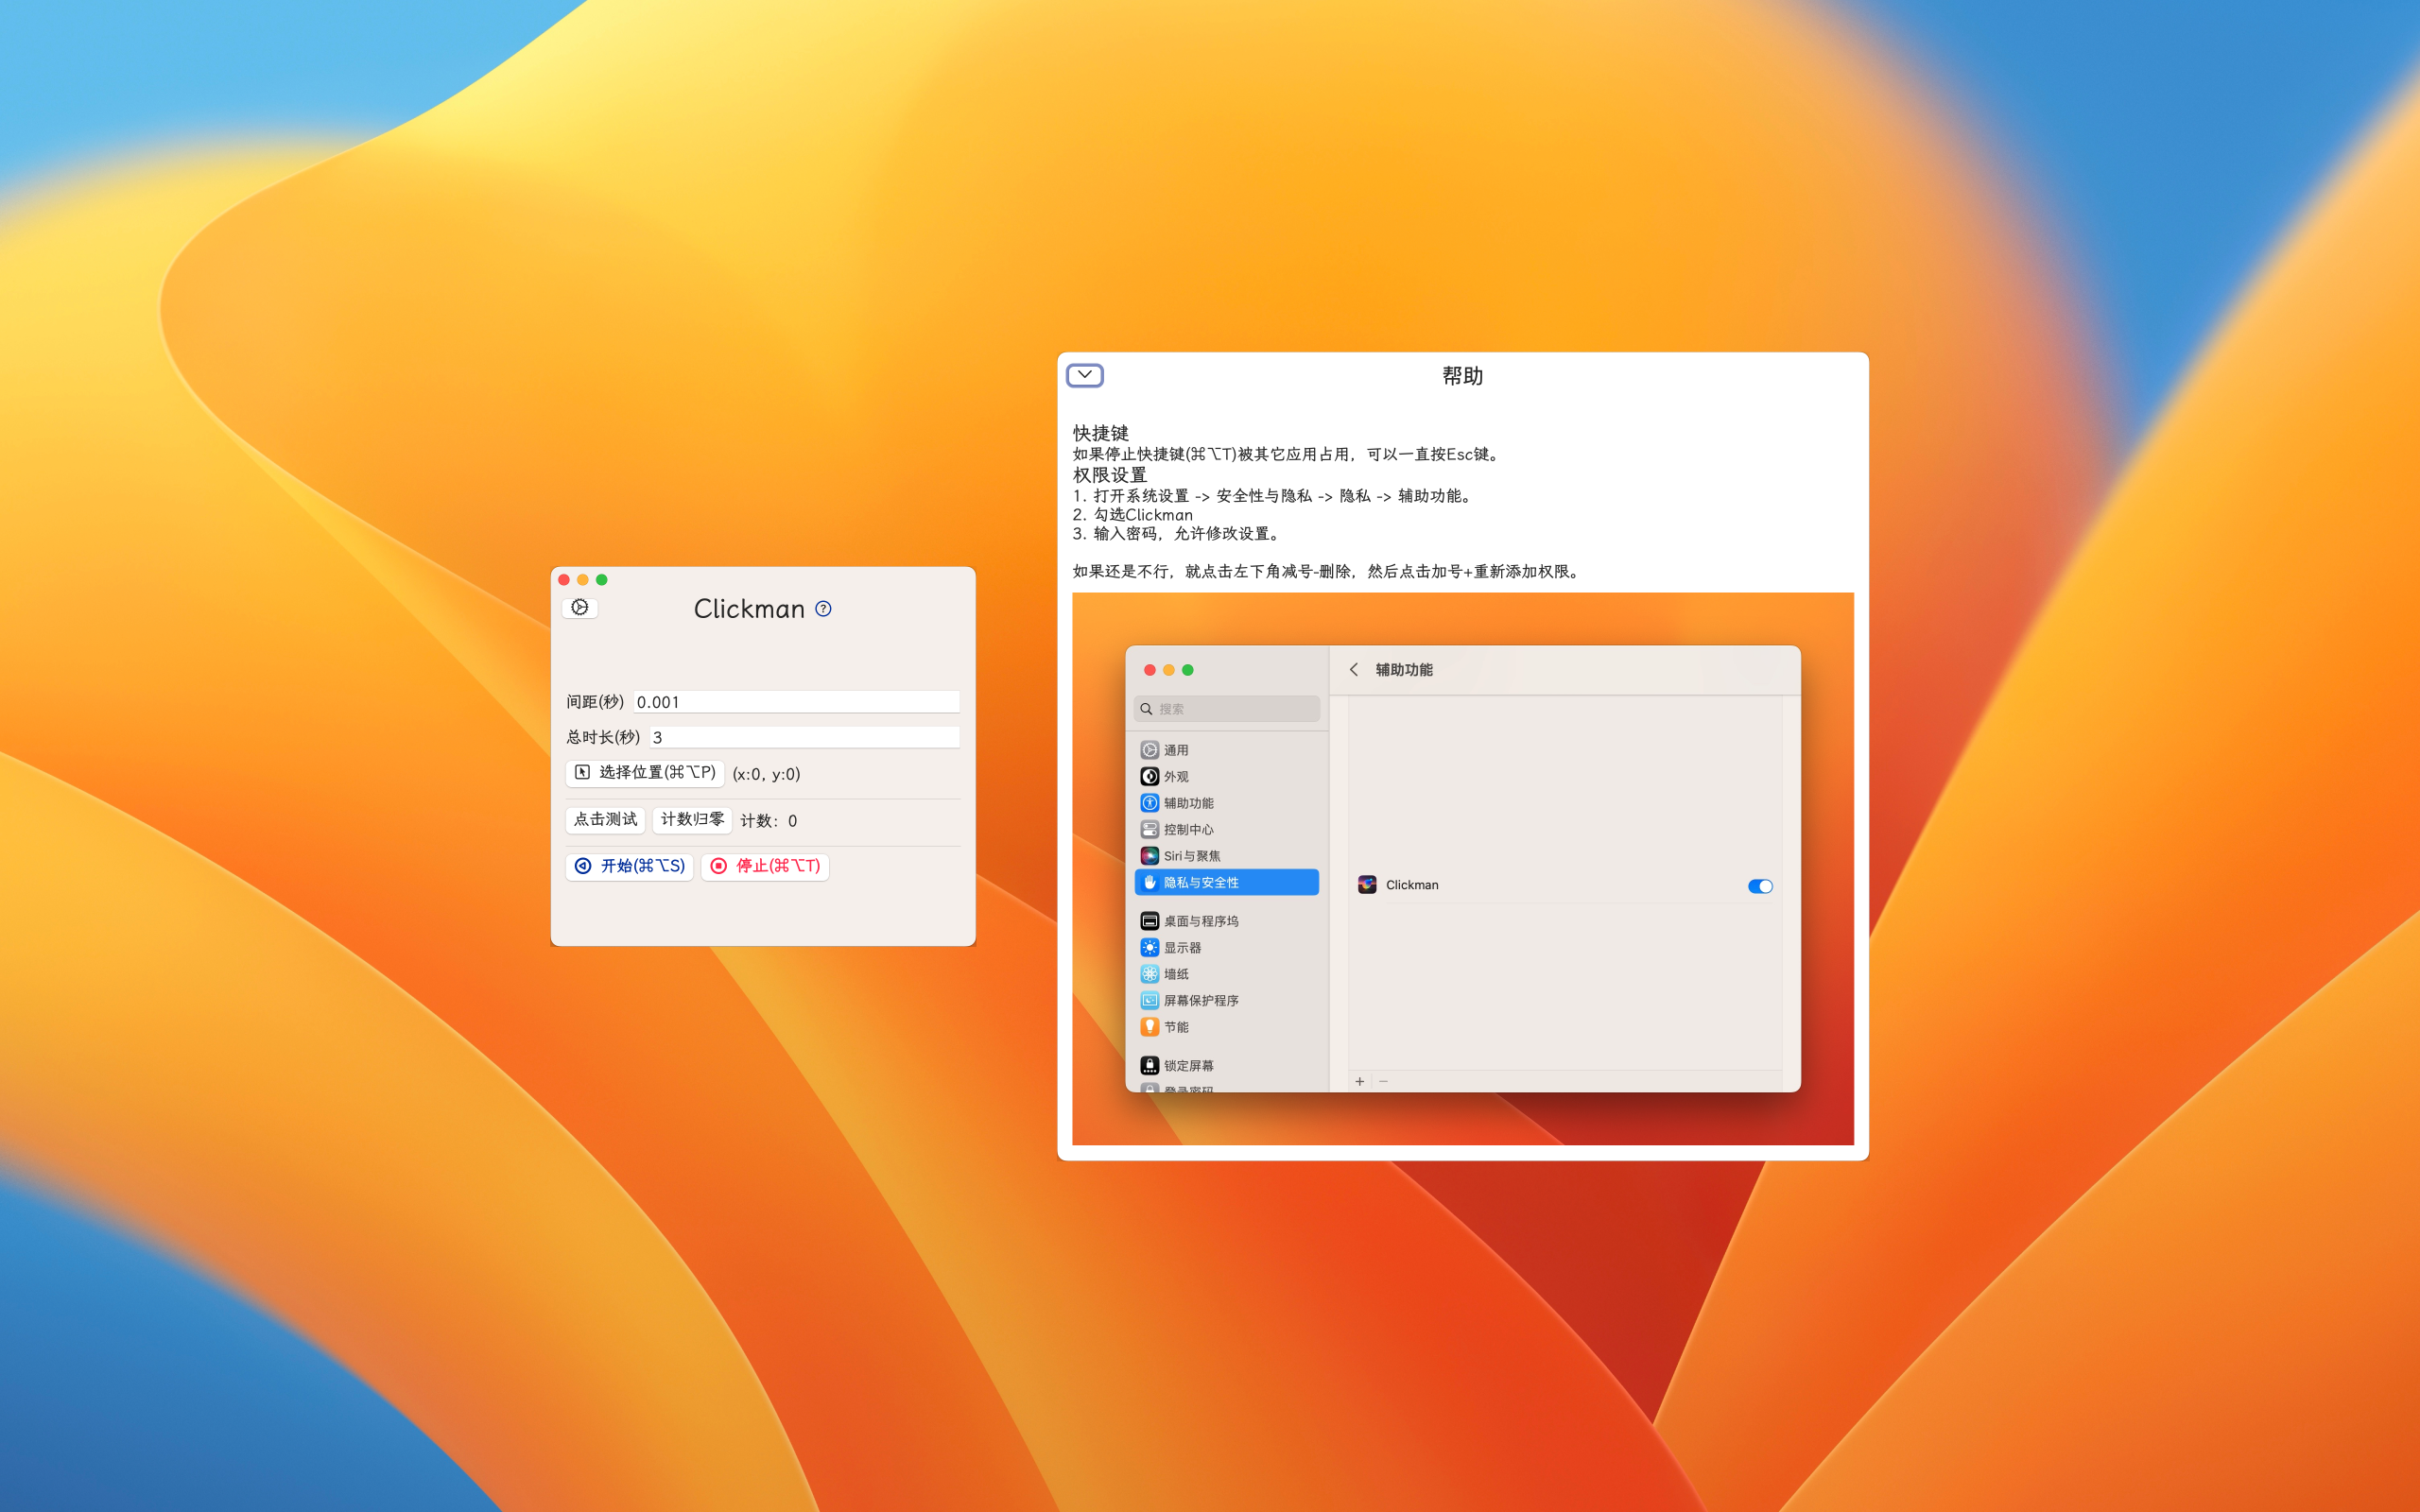
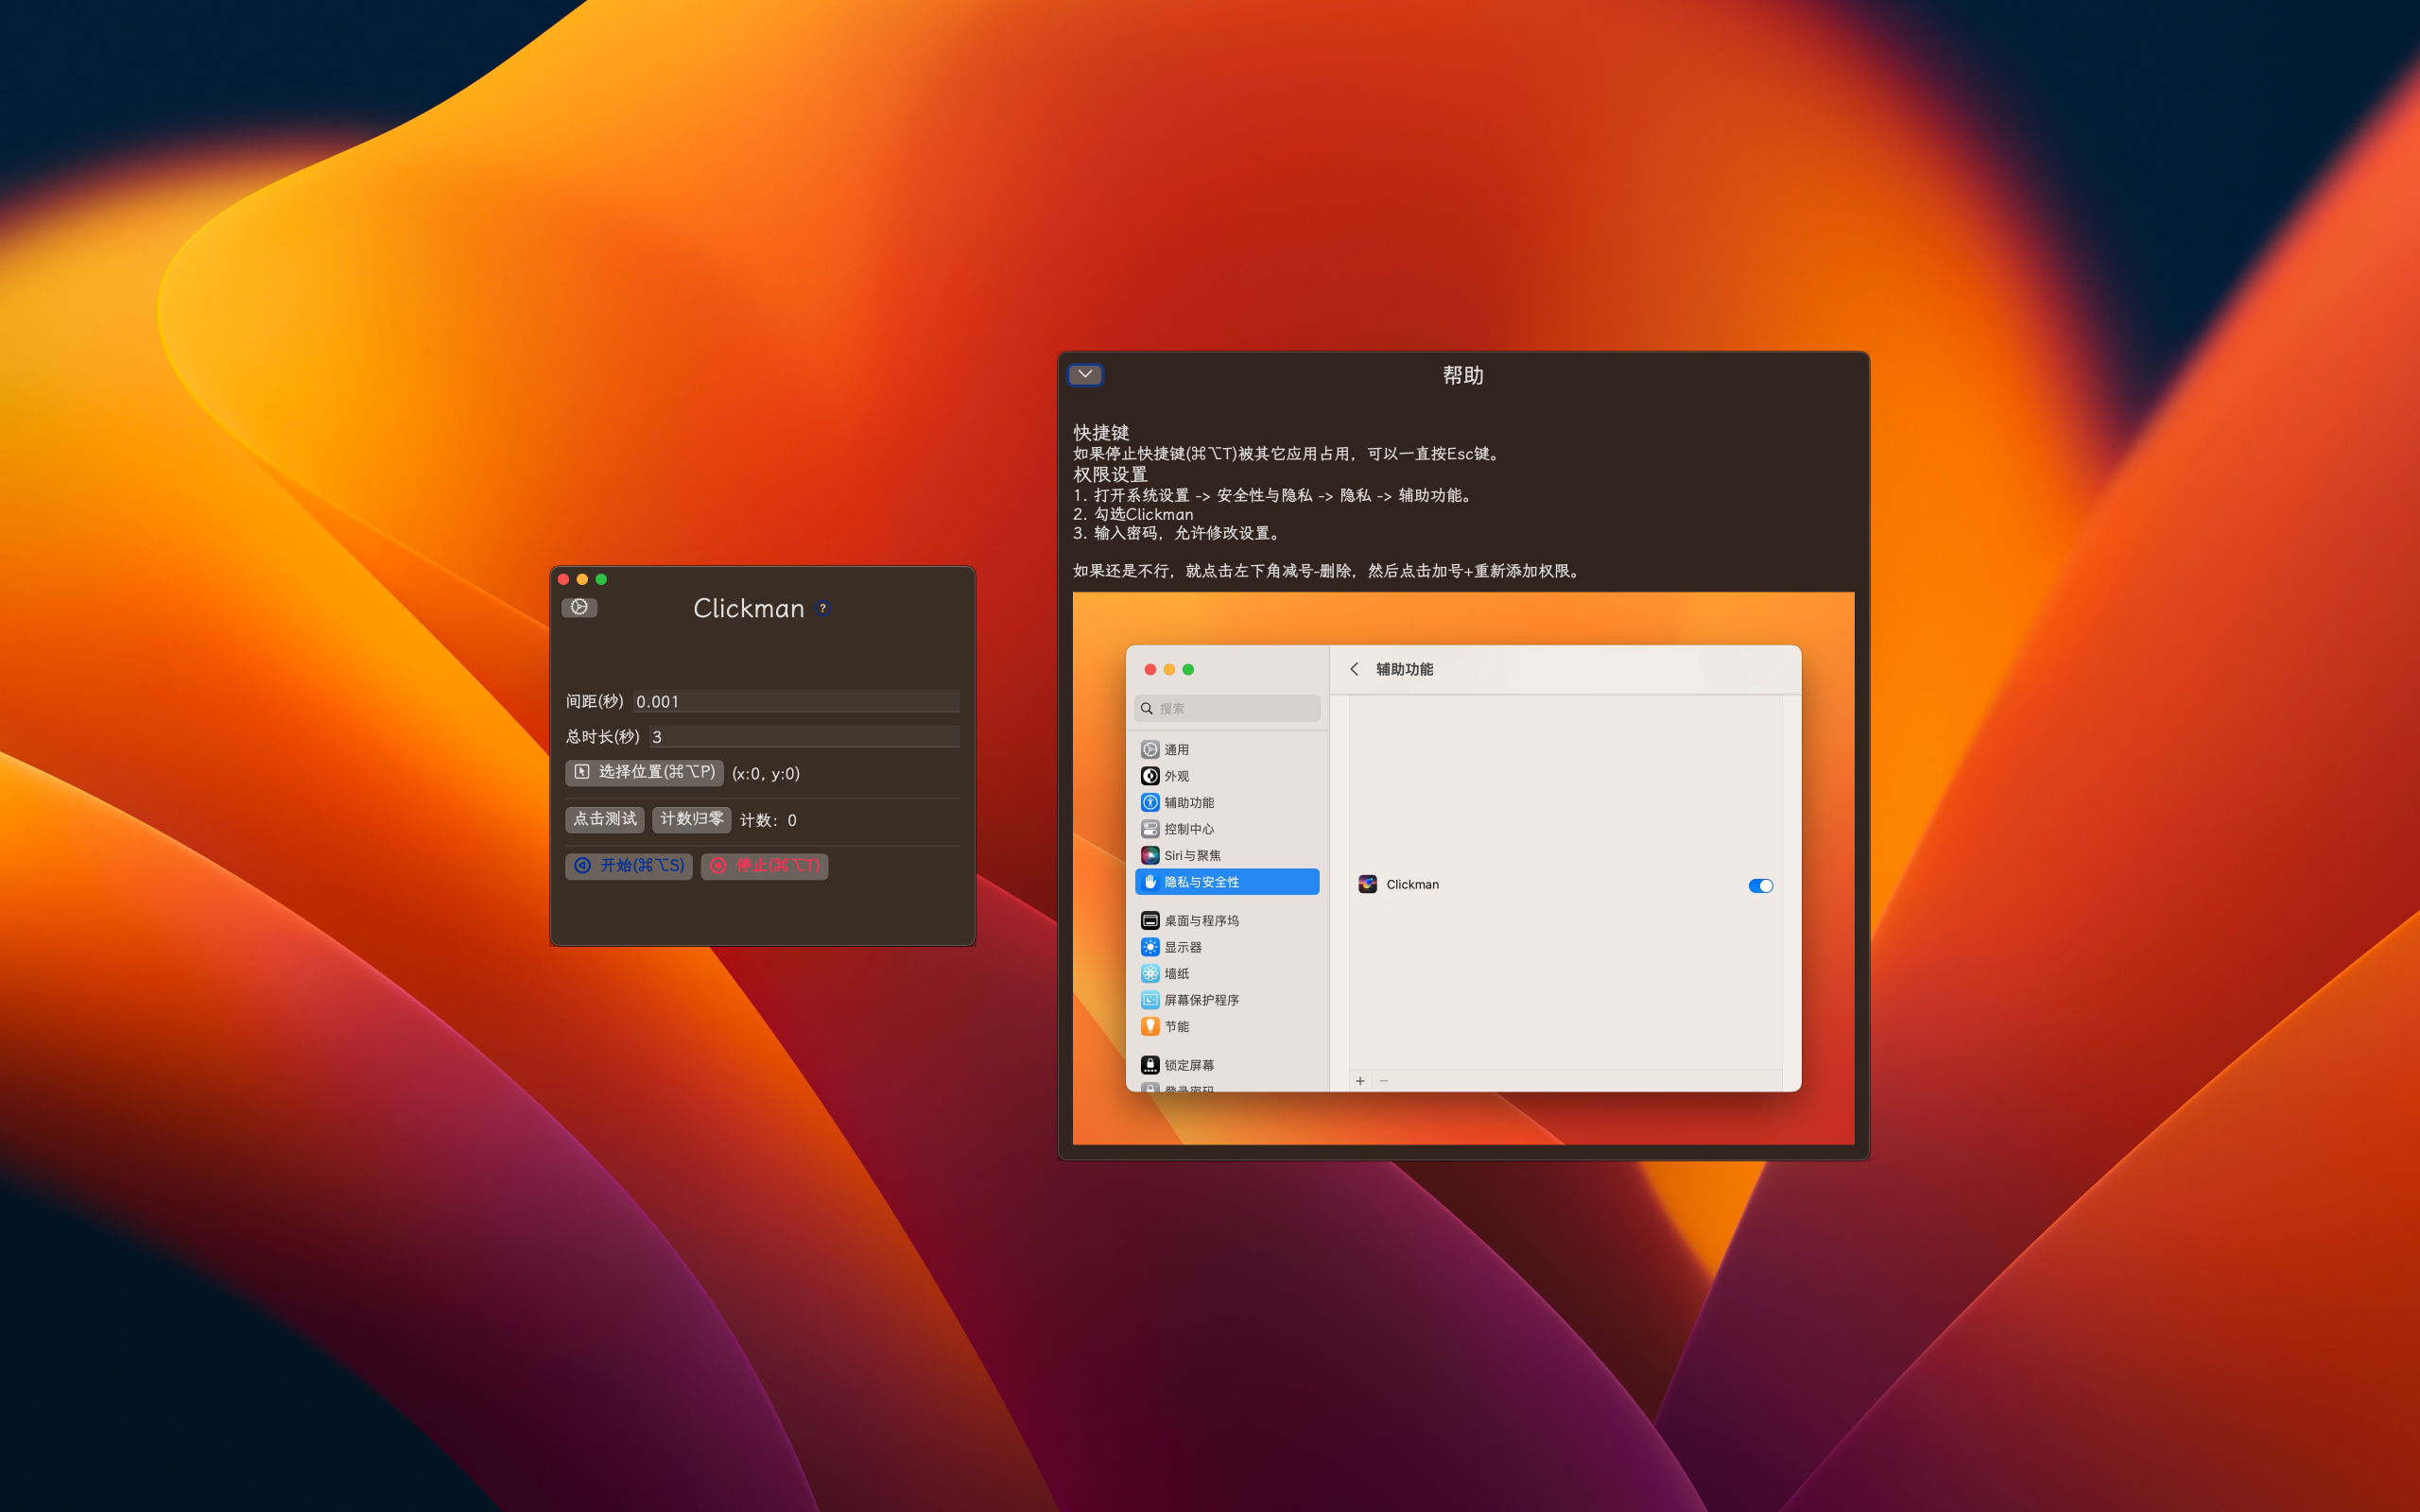
]]>Clickman是一款小巧實用的輔助工具軟件。 它能根據設置的時間間隔,自動爲鼠標按下和釋放左鍵,實現自動連續點擊的效果。 最高每秒約110次點擊。 主要應用場景有以下幾種: 在網絡遊戲中自動重複點擊技能。特別是一些點擊類的空戰或者塔防遊戲,重複點擊攻擊以獲得更高的傷害輸出。 網頁自動刷新或滾動。通過設置適當的點擊間隔和位置,實現鼠標自動上下滾動網頁,相當於手動划動鼠標滾輪的效果。 應用使用有任何問題或建議,歡迎郵件聯繫:531sunlight@gmail.com 本App不進行任何隱私信息收集或上傳。 Clickman是一款小巧实用的辅助工具软件。 它能根据设置的时间间隔,自动为鼠标按下和释放左键,实现自动连续点击的效果。 最高每秒约110次点击。 主要应用场景有以下几种: 在网络游戏中自动重复点击技能。特别是一些点击类的空战或者塔防游戏,重复点击攻击以获得更高的伤害输出。 网页自动刷新或滚动。通过设置适当的点击间隔和位置,实现鼠标自动上下滚动网页,相当于手动划动鼠标滚轮的效果。 应用使用有任何问题或建议,欢迎邮件联系:531sunlight@gmail.com 本App不进行任何隐私信息收集或上传。 视频地址:https://youtu.be/ck4RGeoHFko 资料来源及进一步阅读的文章地址:https://sites.google.com/view/sourcesintelligence 尤其后面几个方面,如果人们偷懒的话,就白白浪如此高级的智慧。现在有AI可以各种辅助工作,应该能帮助人们作出更具高效和创造力的作品。


隱私政策
隐私政策
源
智慧的不同方面

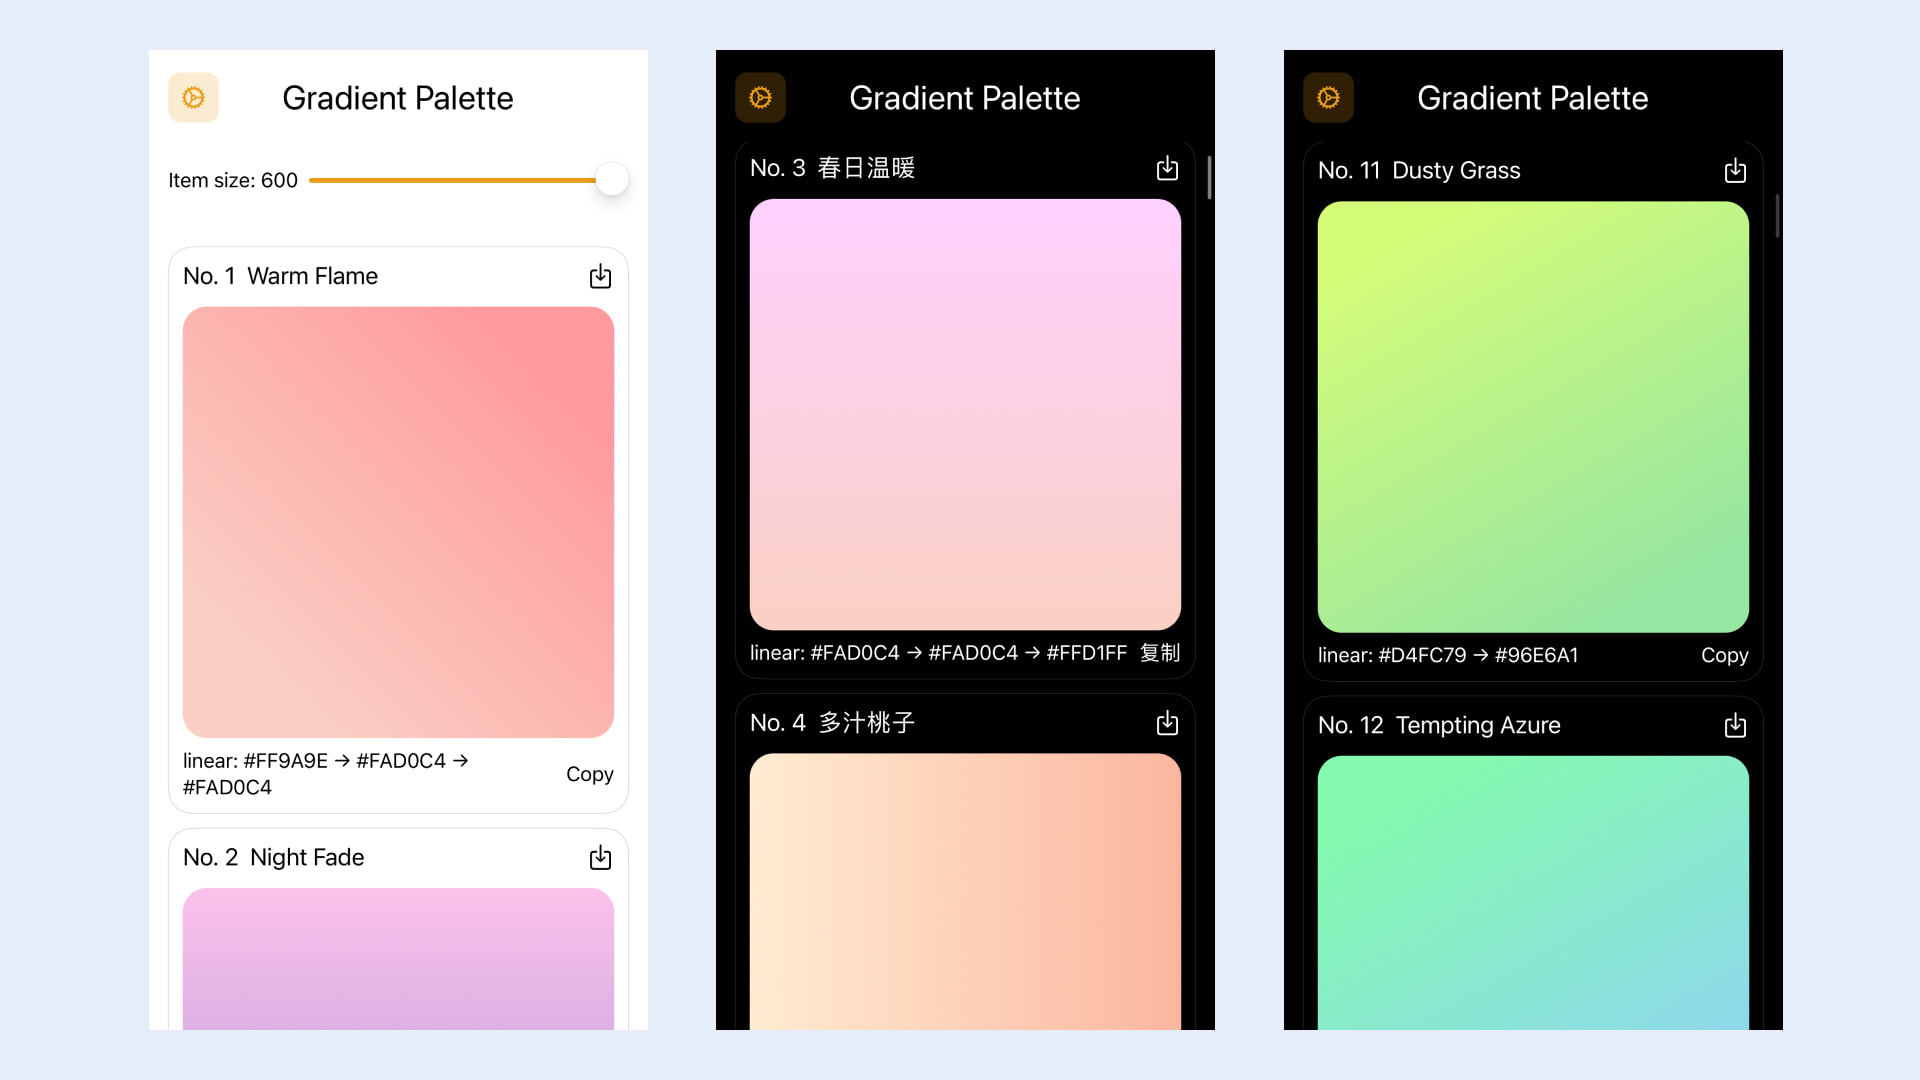
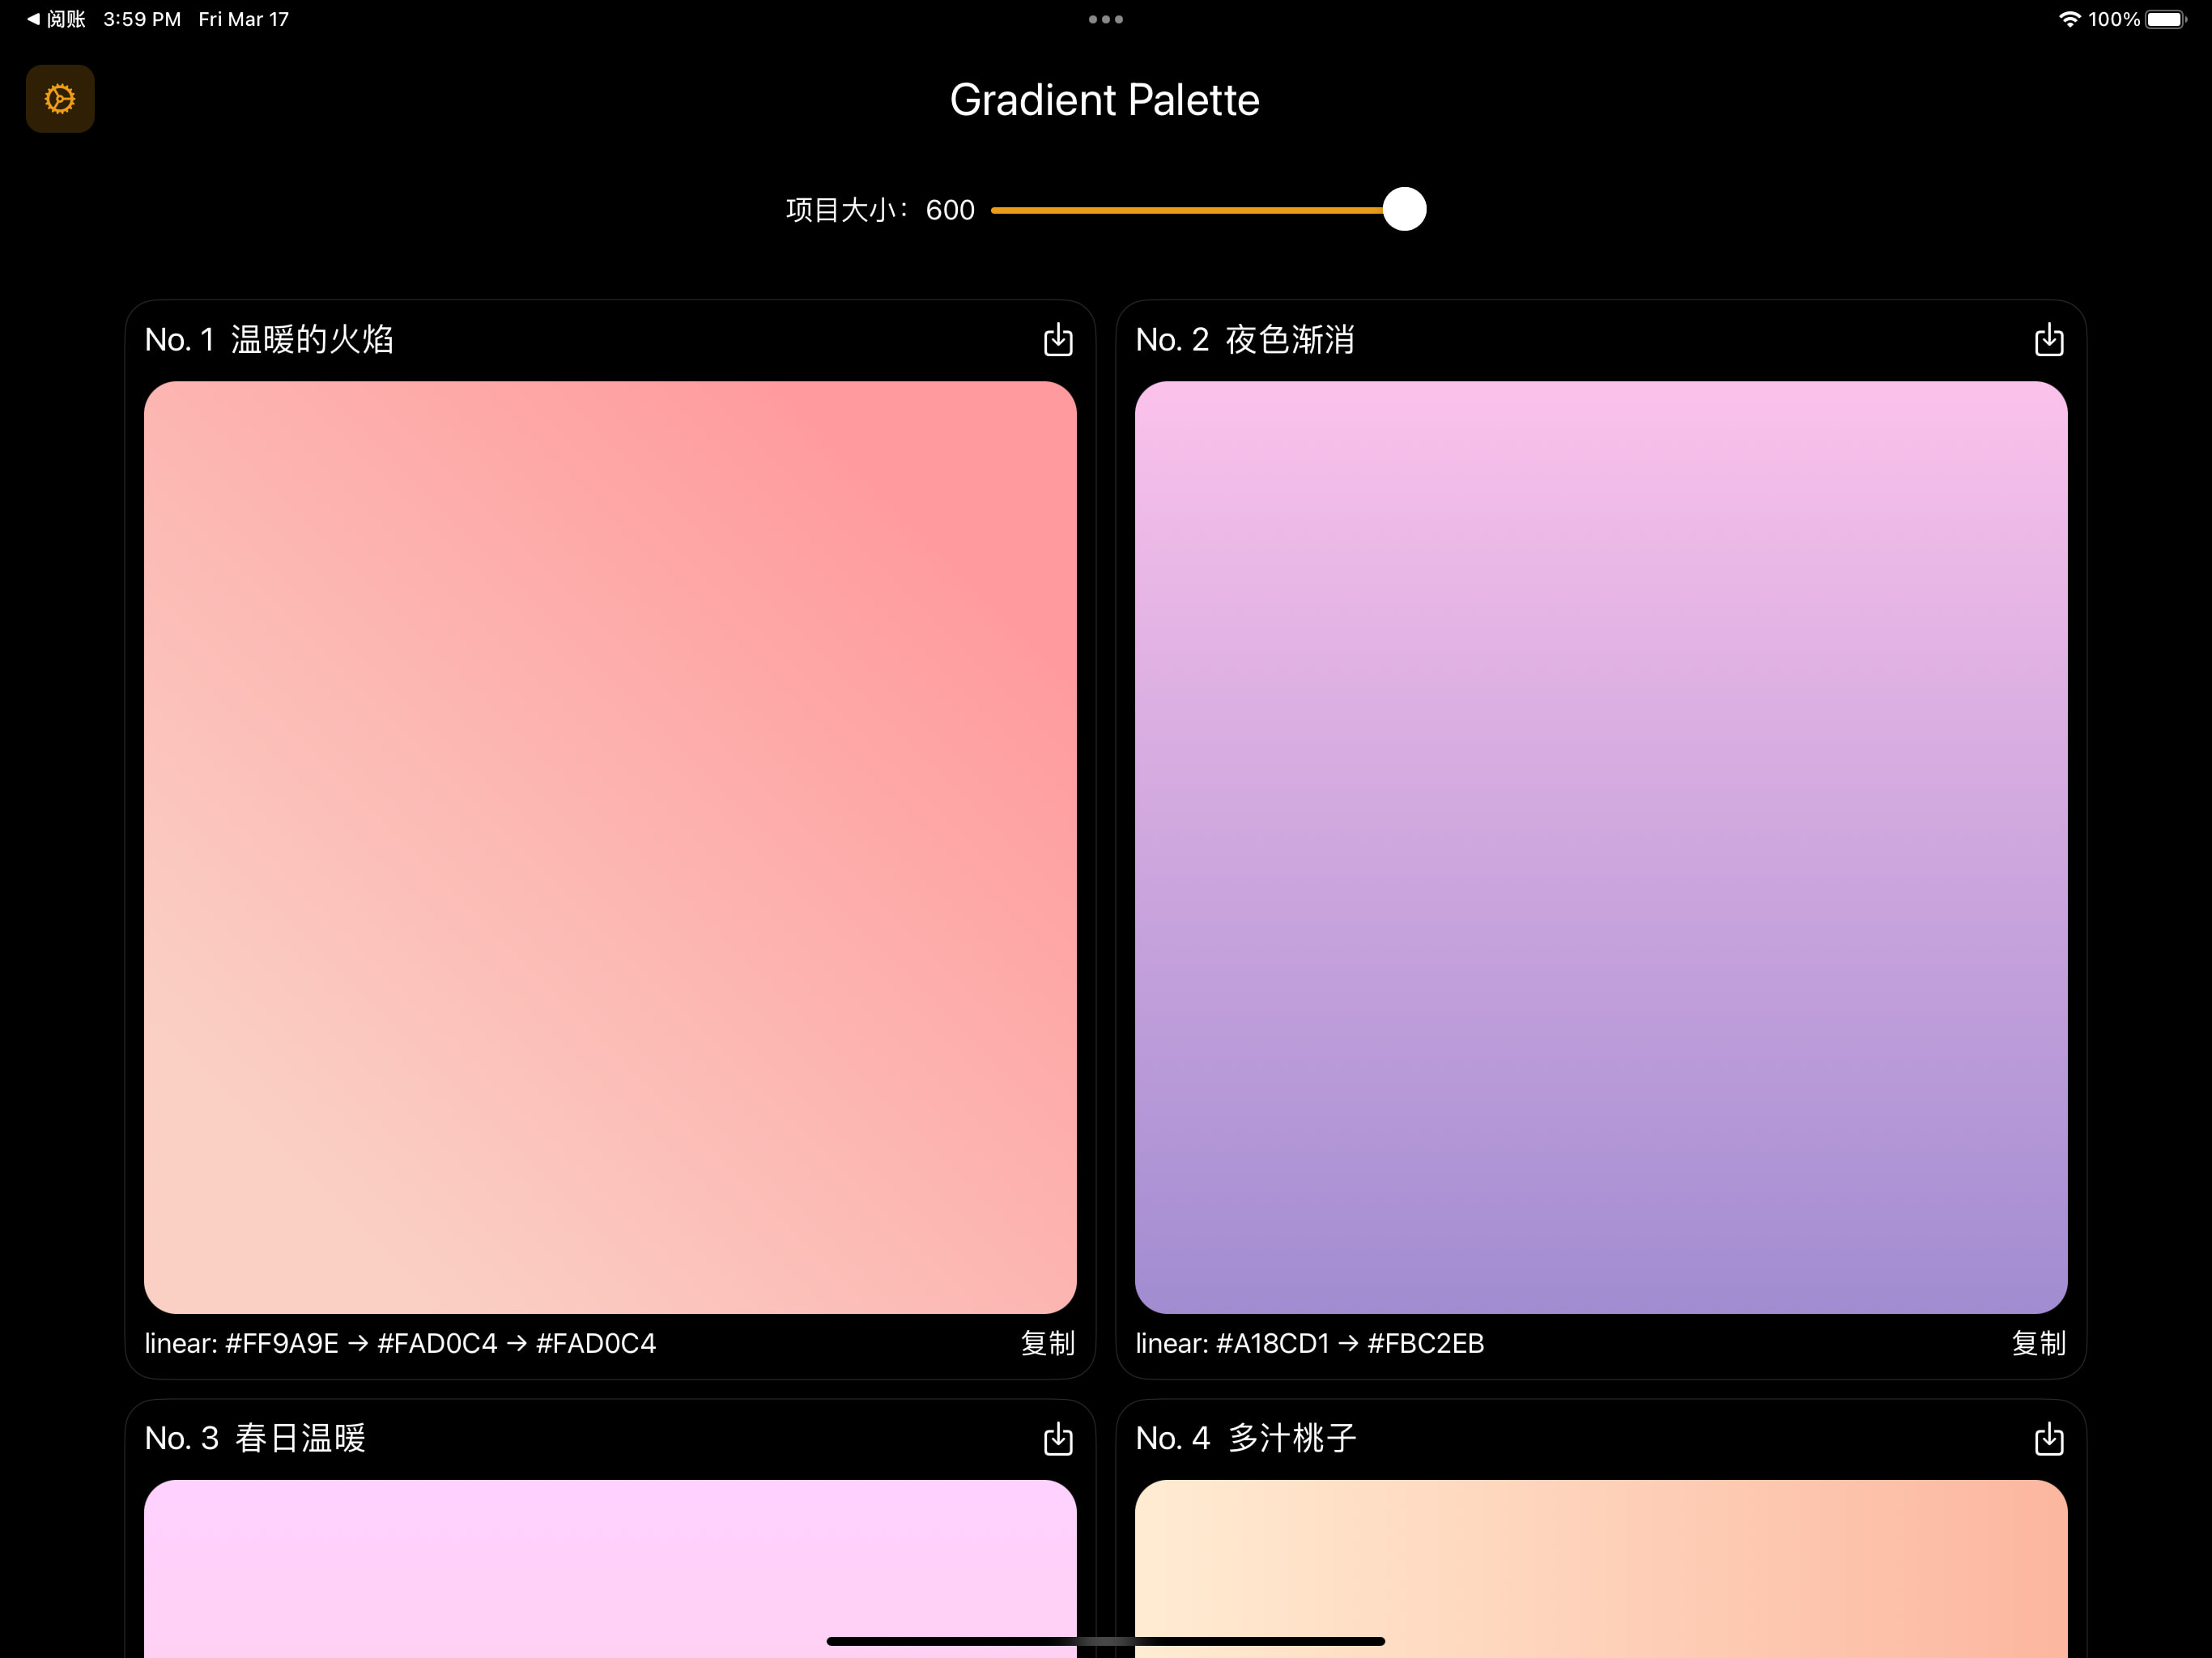
介绍一下Gradient Palette,这是一款专为网页设计师和开发人员打造的终极工具!您是否已经厌倦了为网站背景创建自己的配色方案?那么Gradient Palette将成为您的最佳选择。它是一个免费的集合,包含180个令人惊叹的渐变,可用作网站的任何部分的内容背景。使用这些渐变色调非常简单,只需轻松复制粘贴即可。我们还为每个渐变提供了PNG版本,方便您使用。告别繁琐的自制渐变,拥抱Gradient Palette带来的轻松美丽!
Introducing Gradient Palette, the ultimate tool for web designers and developers! Are you tired of creating your own color schemes for your website backgrounds? Look no further than Gradient Palette, a free collection of 180 stunning gradients that can be used as content backdrops on any part of your website. With easy copy used colors. We’ve also provided a PNG version of each gradient for added convenience. Say goodbye to the hassle of creating your own gradients and hello to the ease and beauty of Gradient Palette!
App Store下载
Download on the App Store
有任何疑问或者建议,可以通过 Email 联系。
If you have any questions or suggestions, you can contact them through Email.
隐私政策
本隐私政策描述了我们如何收集,使用和披露与服务有关的个人信息,您通过访问服务即表示同意。“个人信息”是指有关可识别个人的信息,但不包括商业信息。
收集哪些信息
本应用希望使您与我们的体验令人满意且安全。我们的数据收集政策使您可以选择向我们提供多少个人信息,并控制我们如何使用这些信息。我们的目标是为您提供满意的体验,同时让您控制自己的隐私。本应用收集和使用信息主要是为了使您使用我们的服务更轻松,更有意义。如果您选择向我们注册,则可能会在不同时间要求您提供信息,我们将竭尽所能使本应用满足您的服务并只为您提供所需的内容。
收集的信息与用途
为识别您的设备 ID 并预防恶意程序、提高服务安全性、保障运营质量及效率,我们使用的第三方平台包括Firebase 会收集您的设备信息(包括IMEI、MEID、IMSI、GUID、MAC地址)、您安装的应用信息或运行中的进程信息。
匿名信息是指无法与特定个人联系在一起的信息,我们不知道您的姓名,住处或出生日期。匿名信息可能以多种方式收集,包括通过使用 Cookie,网络信标或从您使用的设备中收集。
第三方分析工具
我们的服务可能包含来自我们服务提供商的第三方跟踪以及数据收集和分析工具,例如 Google Analytics(分析)和 Google Firebase 。此类第三方可以在我们的服务中使用 Cookie,API 和 SDK,以使他们能够代表我们收集和分析与用户和设备相关的数据和信息。第三方可能会访问并收集有关您的数据和信息,例如您的设备标识符(包括IMEI、MEID、IMSI、GUID、MAC地址及其他相关信息),语言环境(使用特定语言的特定位置),地理位置信息,IP 地址,应用程序使用情况,访问权限和会话时间,传感器数据,设备上存在的或在设备上特定时间使用的应用程序以及您对广告的观看和互动,以提供其服务,包括例如启用,提供和投放广告在下面有更详细的说明。
我们的服务提供商的隐私政策可能包括有关其数据收集和使用惯例以及跟踪技术的其他条款和披露,我们鼓励您检查这些隐私政策以了解有关其数据收集和使用惯例以及 Cookie 的使用的更多信息以及其他类似的跟踪技术。
为识别您的设备 ID 并预防恶意程序、提高服务安全性、保障运营质量及效率,我们使用的第三方平台将获取设备序列号。
- Google
隐私政策:https://policies.google.com/privacy
第三方广告合作伙伴
我们与各种广告商,广告网络,广告服务器和分析公司合作。这些广告商,广告网络,广告服务器和分析公司使用各种技术以及第三方公司的技术来收集数据,以便向您和其他用户发送(或投放)相关广告。这些技术可能包括放置Cookie或网络信标,使用唯一或非唯一的非个人标识符,或在我们的服务上使用其他技术,并且这些技术可用于跟踪用户行为,跟踪我们如何服务正在使用中,有可能为您提供更多相关的广告。这些目标广告可能会出现在我们的服务或您访问的其他服务上。本隐私政策不涵盖广告商,广告网络,广告服务器和分析公司对各种技术的使用。这些公司还可能从您从其他公司使用的服务中获取信息,这些服务包括但不限于其他网站,移动网站,可移动下载的应用程序和可下载的桌面应用程序,并将这些信息与他们通过我们的服务通过这些第三方技术获取的信息结合在一起。您应该意识到,我们无法控制这些第三方技术或其中包含的信息。
更新
本应用可以随时修改本隐私政策。请经常检查是否有任何更改。继续使用服务,即表示您接受本隐私政策的所有更新。此版本于 2023 年 03 月 17 日更新。
联系我们
我们希望此声明能为您提供丰富而清晰的信息。如果您有任何疑问或进一步的信息,请给我们发送电子邮件。
App 与服务反馈: 531sunlight@gmail.com
Privacy Policy
This privacy policy describes how we collect, use, and disclose personal information related to the service you agree to by accessing the service. “Personal information” means information about identifiable individuals, but does not include business information.
What information we collect
We aim to make your experience with our application satisfactory and secure. Our data collection policy allows you to choose how much personal information to provide us with and control how we use that information. Our goal is to provide you with a satisfactory experience while giving you control over your privacy. Our application primarily collects and uses information to make it easier and more meaningful for you to use our service. If you choose to register with us, we may ask for information at various times, and we will do our best to make the application meet your needs and provide you with only the necessary content.
Information Collected and its Purpose
To identify your device ID and prevent malicious programs, improve service security, guarantee operational quality and efficiency, we use third-party platforms, including Firebase, to collect your device information (including IMEI, MEID, IMSI, GUID, MAC address), information on the applications you have installed or running processes.
“Anonymous information” refers to information that cannot be associated with specific individuals, and we do not know your name, address, or date of birth. Anonymous information may be collected in various ways, including through the use of cookies, web beacons, or collected from the device you use.
Third-Party Analytics Tools
Our service may contain third-party tracking and data collection and analysis tools from our service providers, such as Google Analytics (analytics) and Google Firebase. Such third parties may use cookies, APIs, and SDKs in our service to collect and analyze data and information related to users and devices on our behalf. Third parties may access and collect data and information about you, such as your device identifier (including IMEI, MEID, IMSI, GUID, MAC address, and other relevant information), language environment (specific locations using specific languages), geographical location information, IP address, application usage, access permissions and session time, sensor data, applications that exist on the device or have been used at specific times on the device, and your viewing and interaction with advertisements to provide their services, including enabling, providing, and serving ads. There is more detailed information on this below.
The privacy policies of our service providers may include other terms and disclosures regarding their data collection and use practices, as well as other similar tracking technologies such as cookies. We encourage you to review these privacy policies for more information about their data collection and use practices and the use of cookies and similar tracking technologies.
To identify your device ID and prevent malicious programs, improve service security, guarantee operational quality and efficiency, the third-party platforms we use will obtain the device serial number.
Google
Privacy Policy: https://policies.google.com/privacy
Third-Party Advertising Partners
We work with various advertisers, ad networks, ad servers, and analytics companies. These advertisers, ad networks, ad servers, and analytics companies use various technologies as well as technologies from third-party companies to collect data to send (or serve) relevant ads to you and other users. These technologies may include placing cookies or web beacons, using unique or non-unique non-personal identifiers, or using other technologies on our service, and these technologies may be used to track user behavior, track how our service is being used, and potentially provide you with more relevant ads. These targeted ads may appear on our service or other services you visit. This privacy policy does not cover the use of various technologies by advertisers, ad networks, ad servers, and analytics companies. These companies may also obtain information from the services you use from other companies, including but not limited to other websites, mobile websites, downloadable applications, and downloadable desktop applications, and combine this information with the information they obtain through these third-party technologies via our service. You should be aware that we have no control over these third-party technologies or the information contained therein.
Updates
This application may modify this Privacy Policy at any time. Please check for any changes frequently. Your continued use of the service indicates your acceptance of all updates to this Privacy Policy. This version was updated on March 17th, 2023.
Contact Us
We hope this statement provides you with rich and clear information. If you have any questions or further information, please email us.
App and Service Feedback:
]]>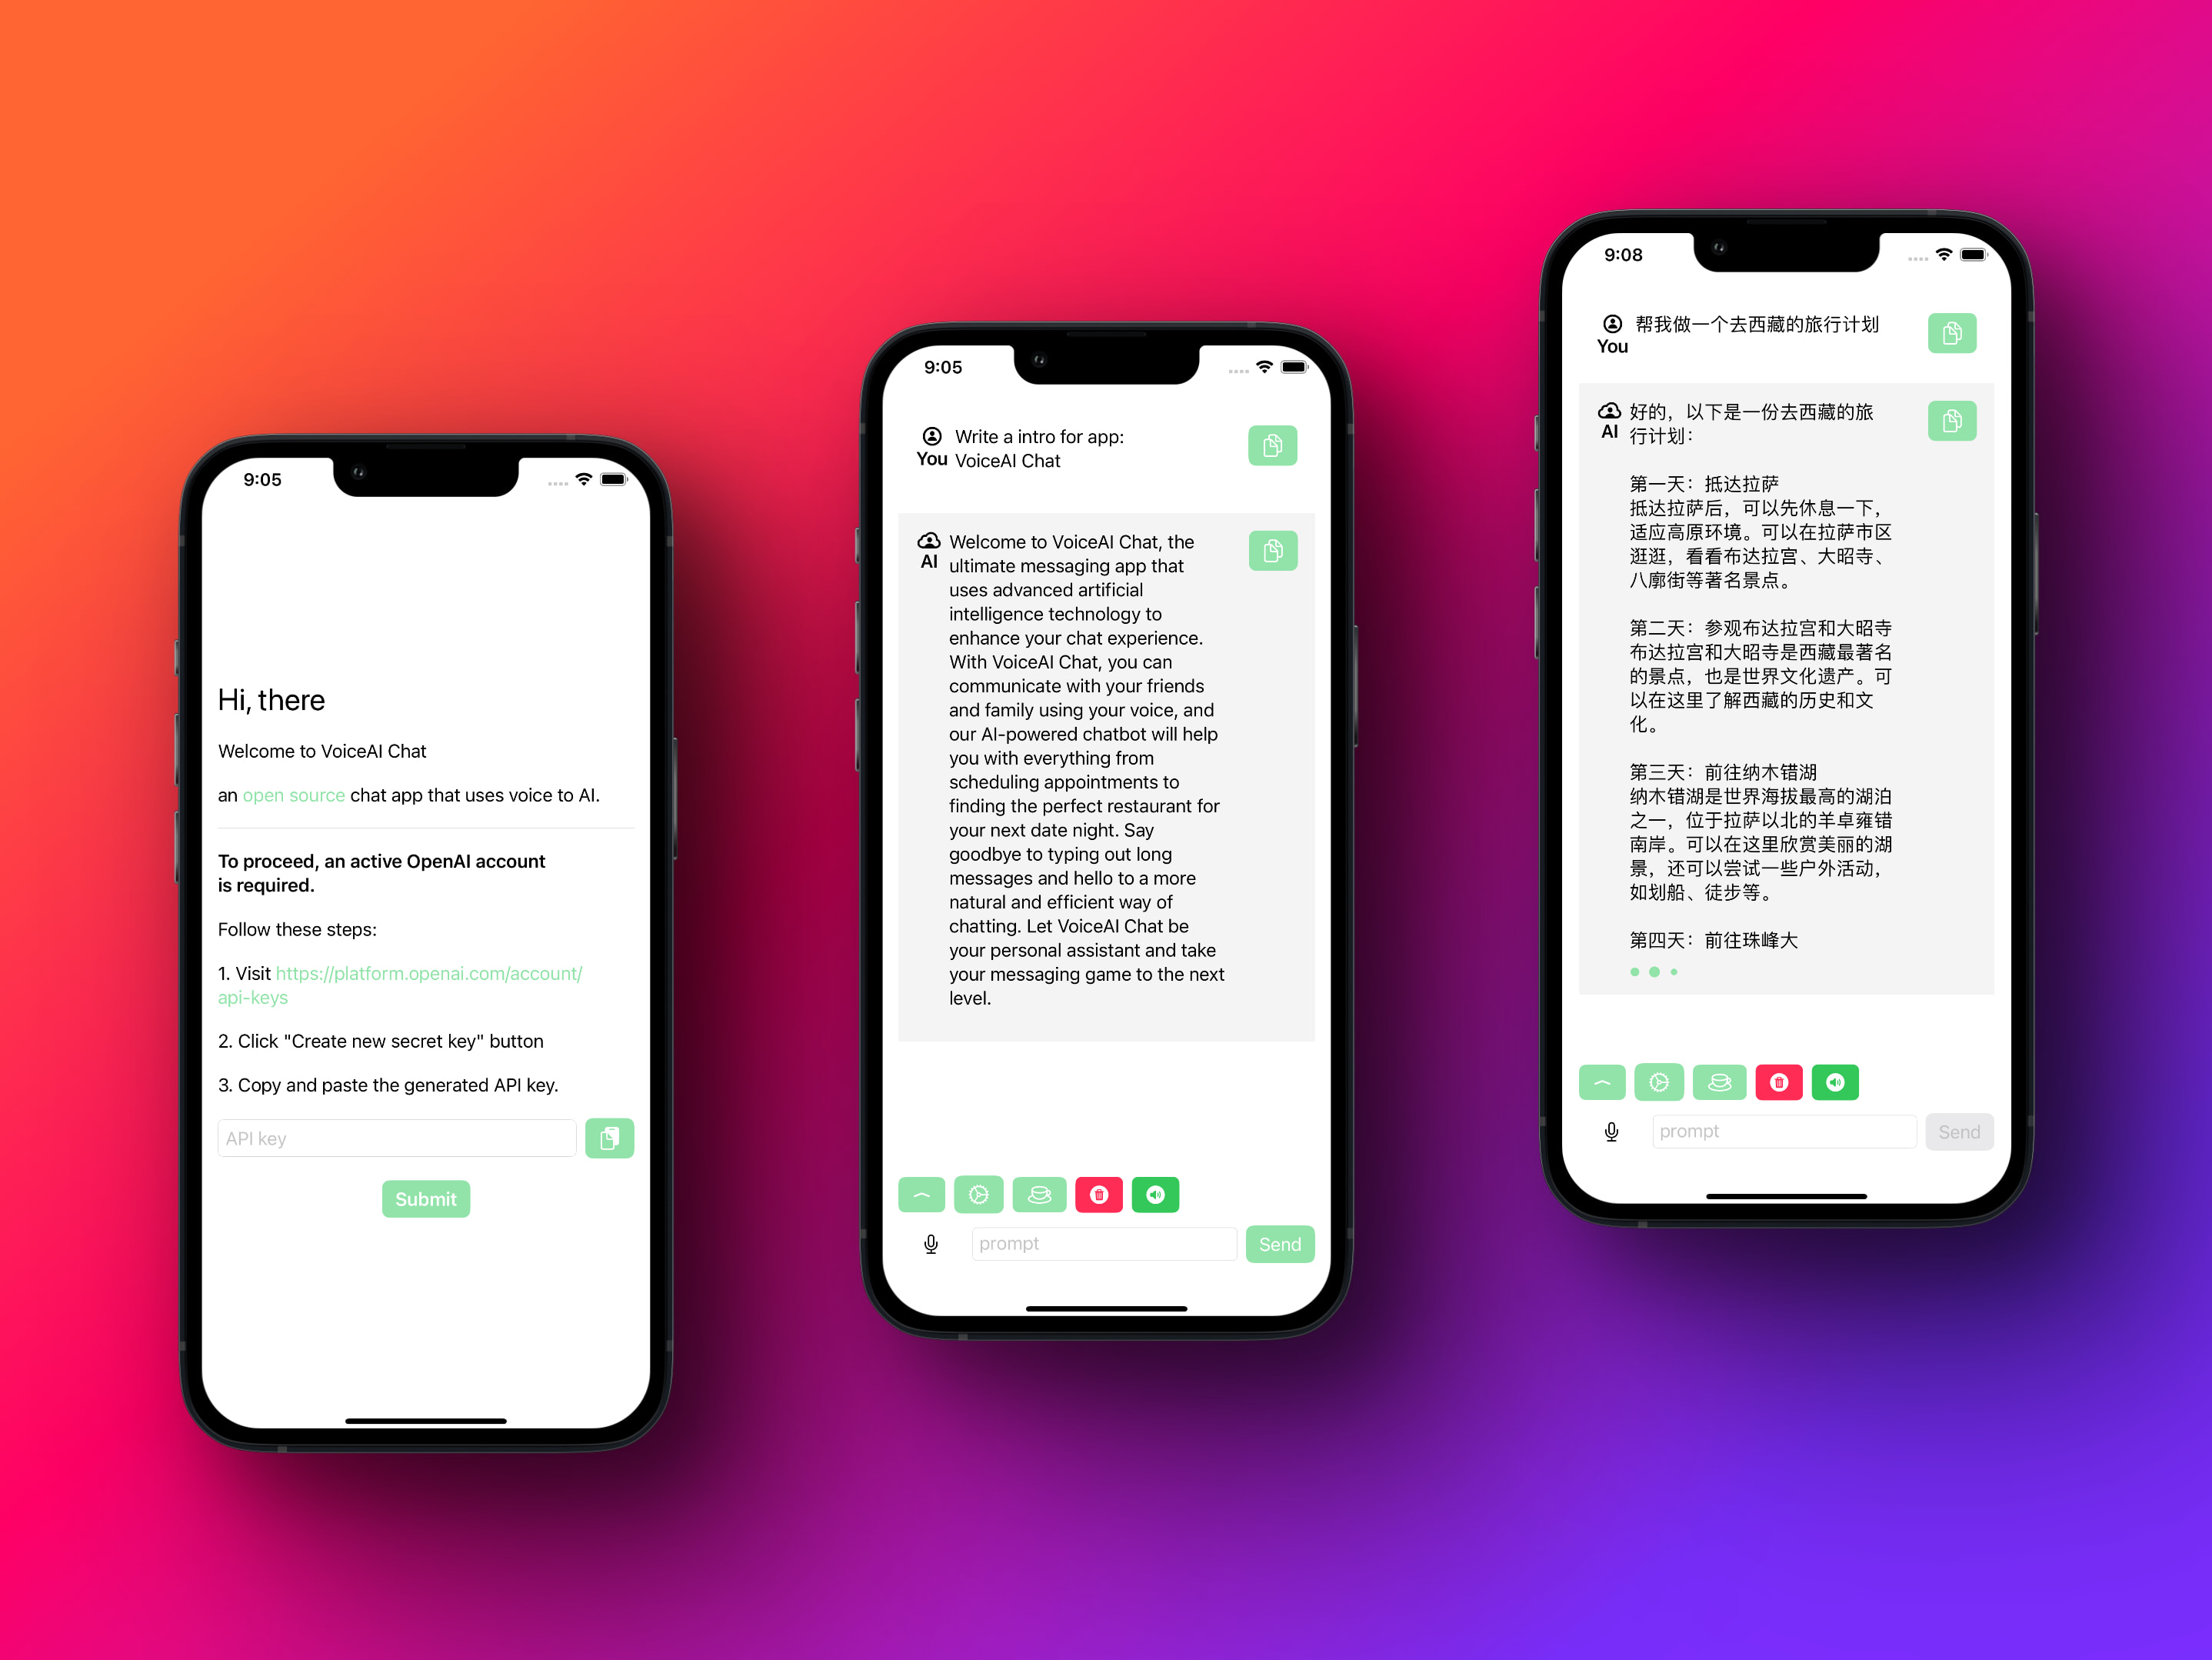
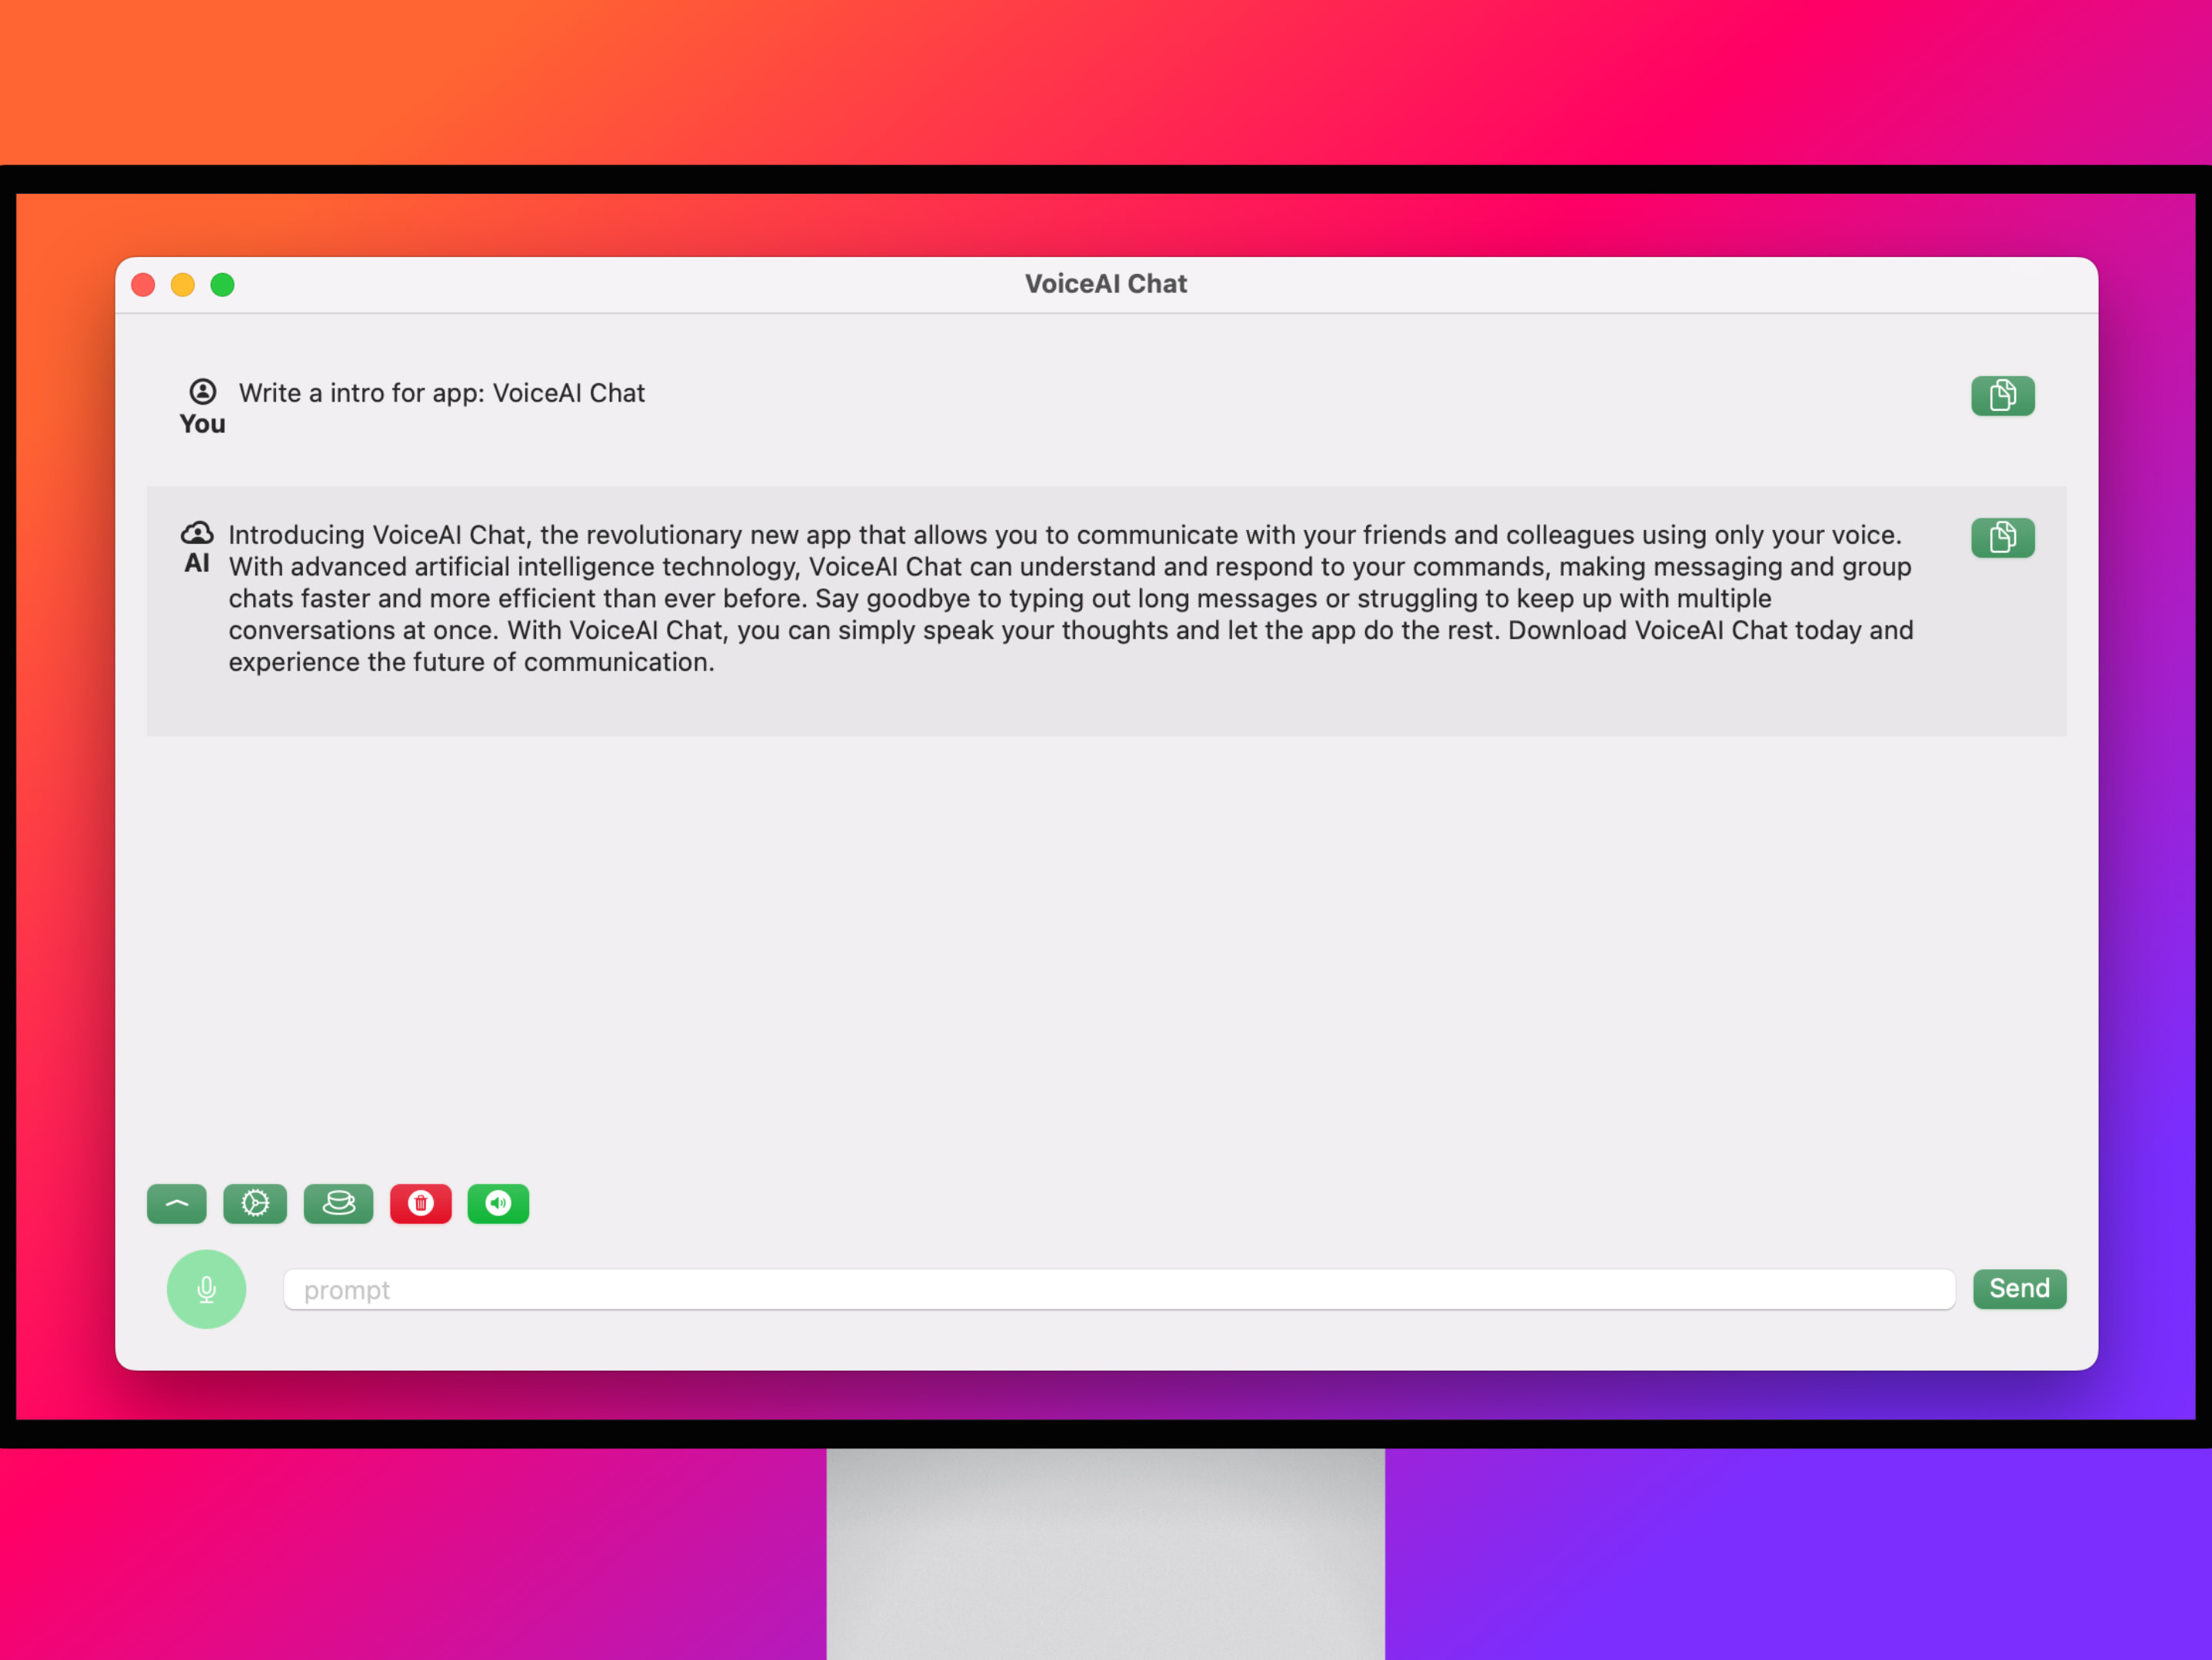
VoiceAI Chat是一个简单且用户友好的AI聊天应用程序,支持文本和语音输入,能够识别口语并将其转录为文本。此外,该应用程序可以大声朗读AI生成的响应。在先进的OpenAI技术的支持下,用户可以在获得API密钥后轻松与应用程序聊天。
此外,开源代码使应用程序透明且值得信赖。
VoiceAI Chat is a simple and user-friendly AI chat application that supports both text and voice input, with the ability to recognize and transcribe spoken language into text. In addition, the app can read out AI-generated responses aloud. Powered by advanced OpenAI technology, users can easily chat with the app after obtaining an API key.
Moreover, the open-source code makes the application transparent and trustworthy.
App Store下载
Download on the App Store
有任何疑问或者建议,可以通过 Email 联系。
If you have any questions or suggestions, you can contact them through Email.
隐私政策Privacy policy
本App不进行任何隐私信息收集或上传。
This App does not collect or upload any private information.
]]>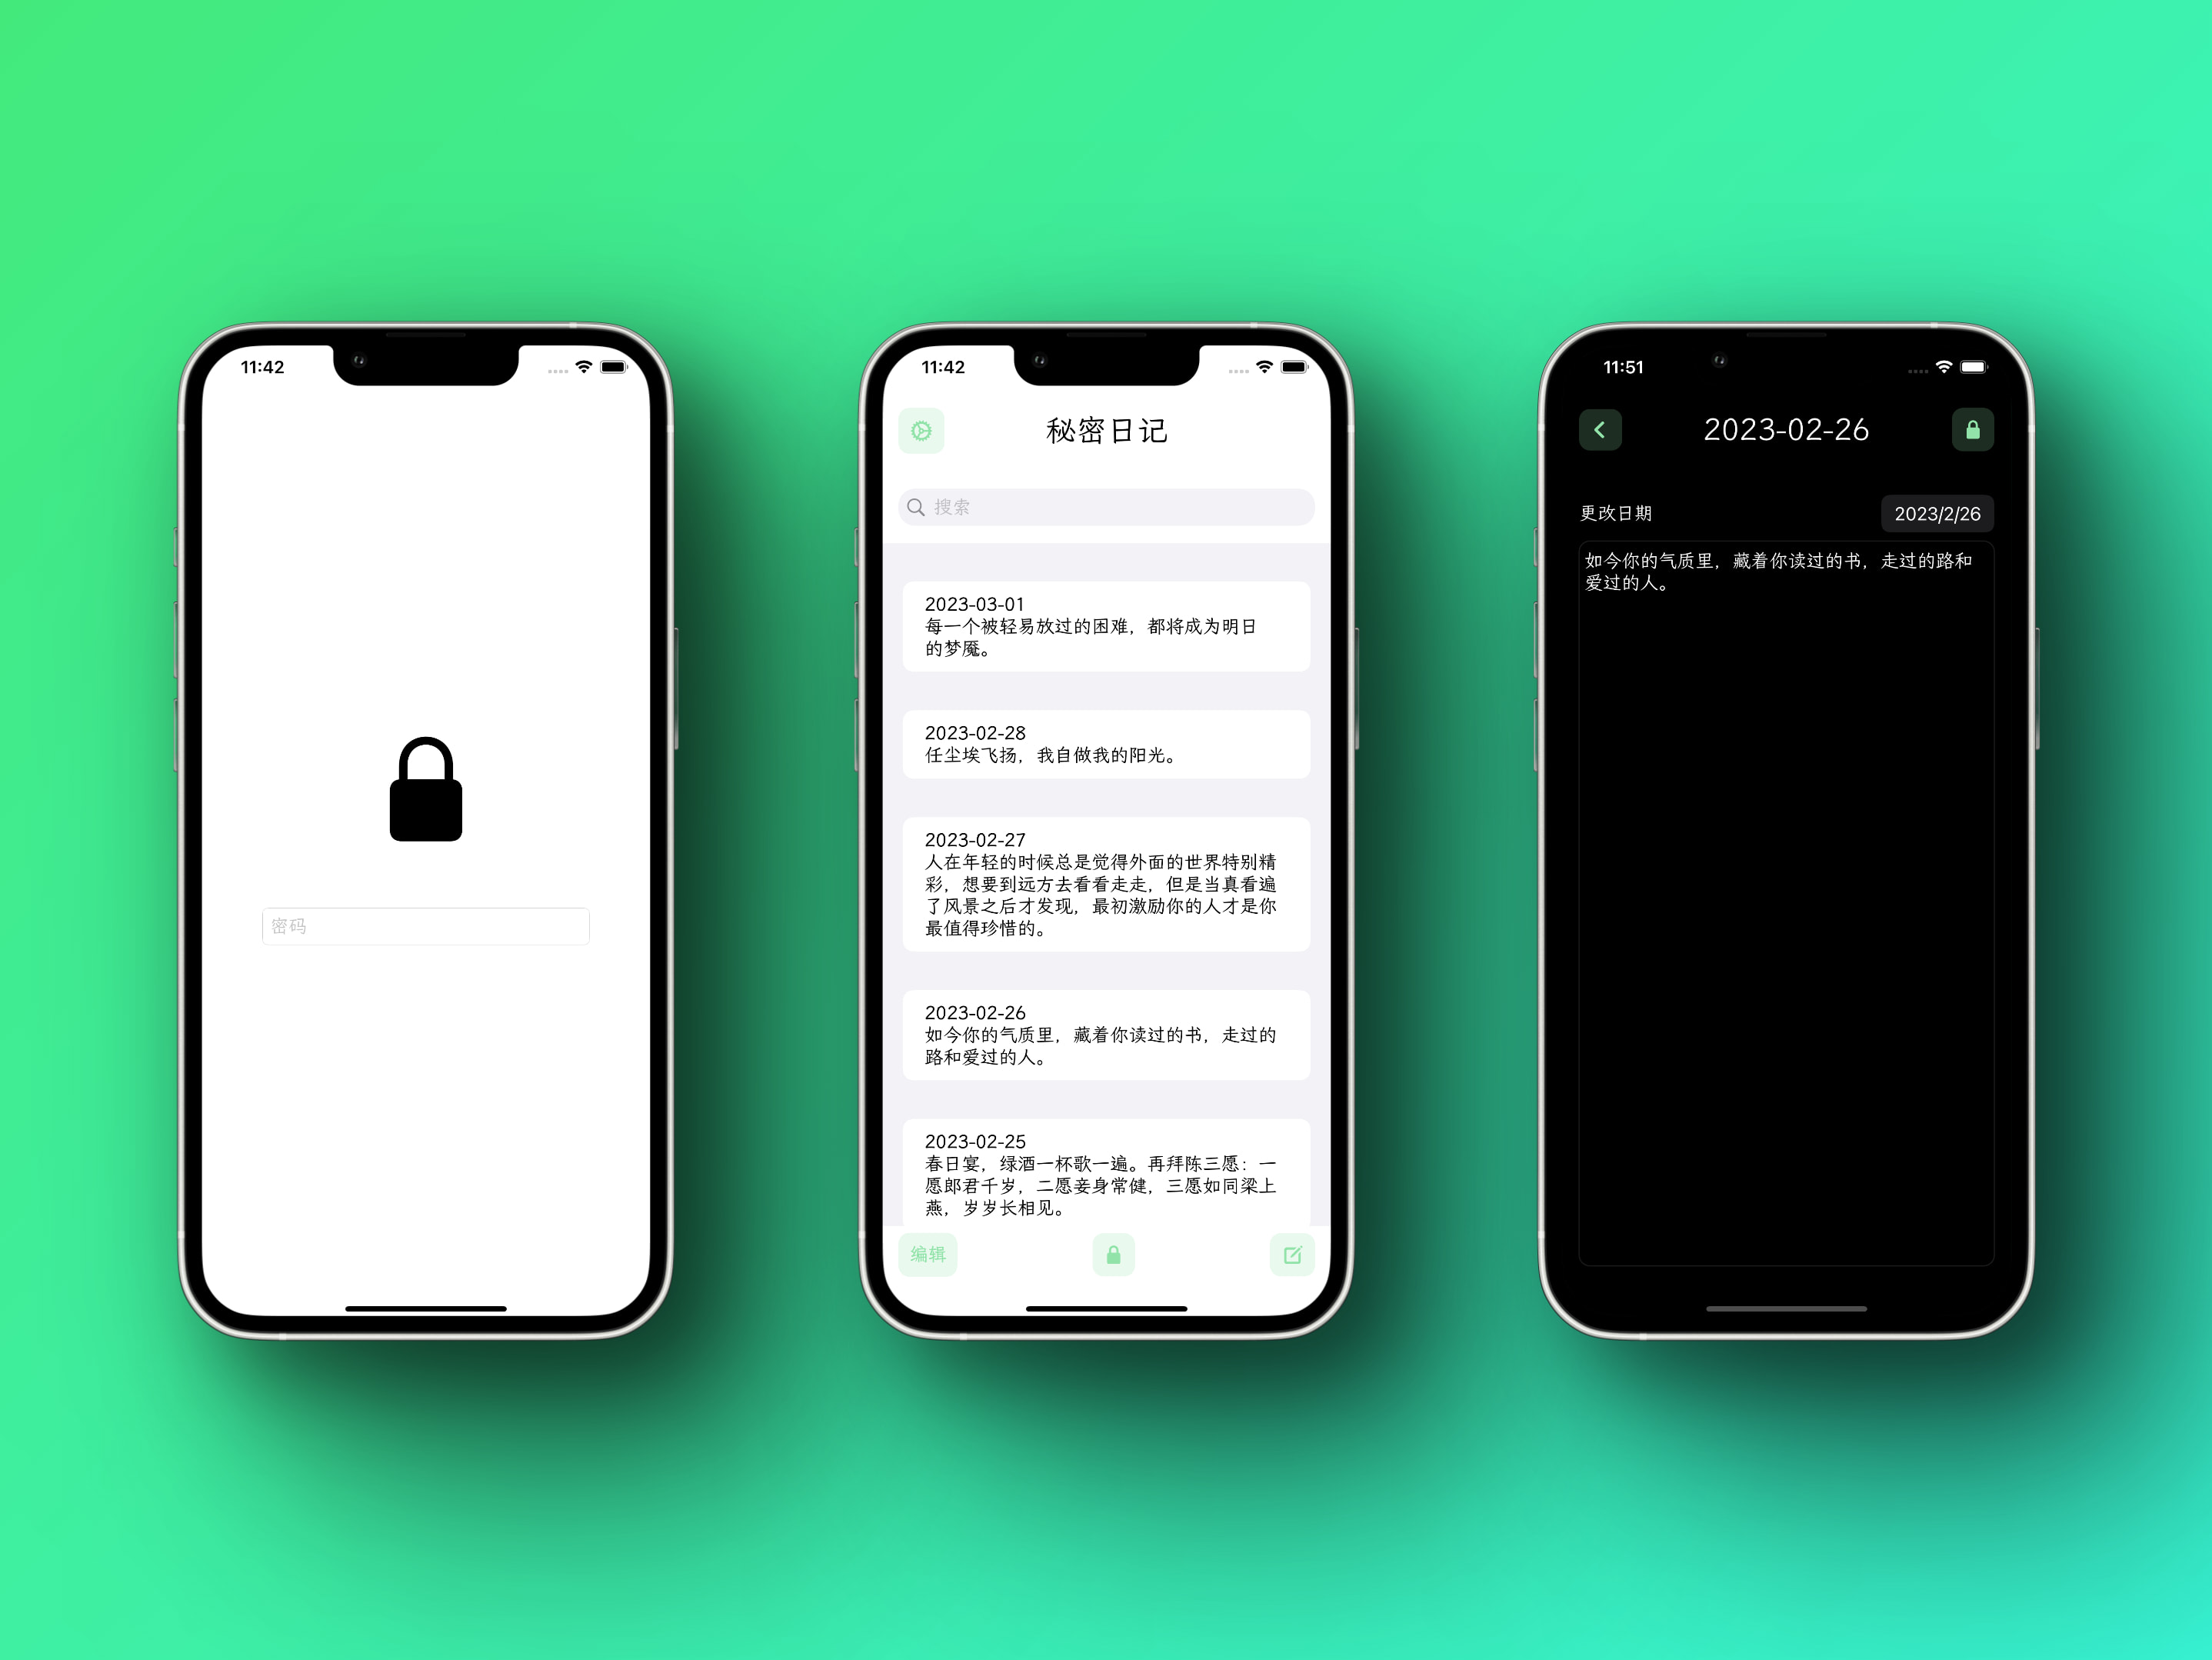
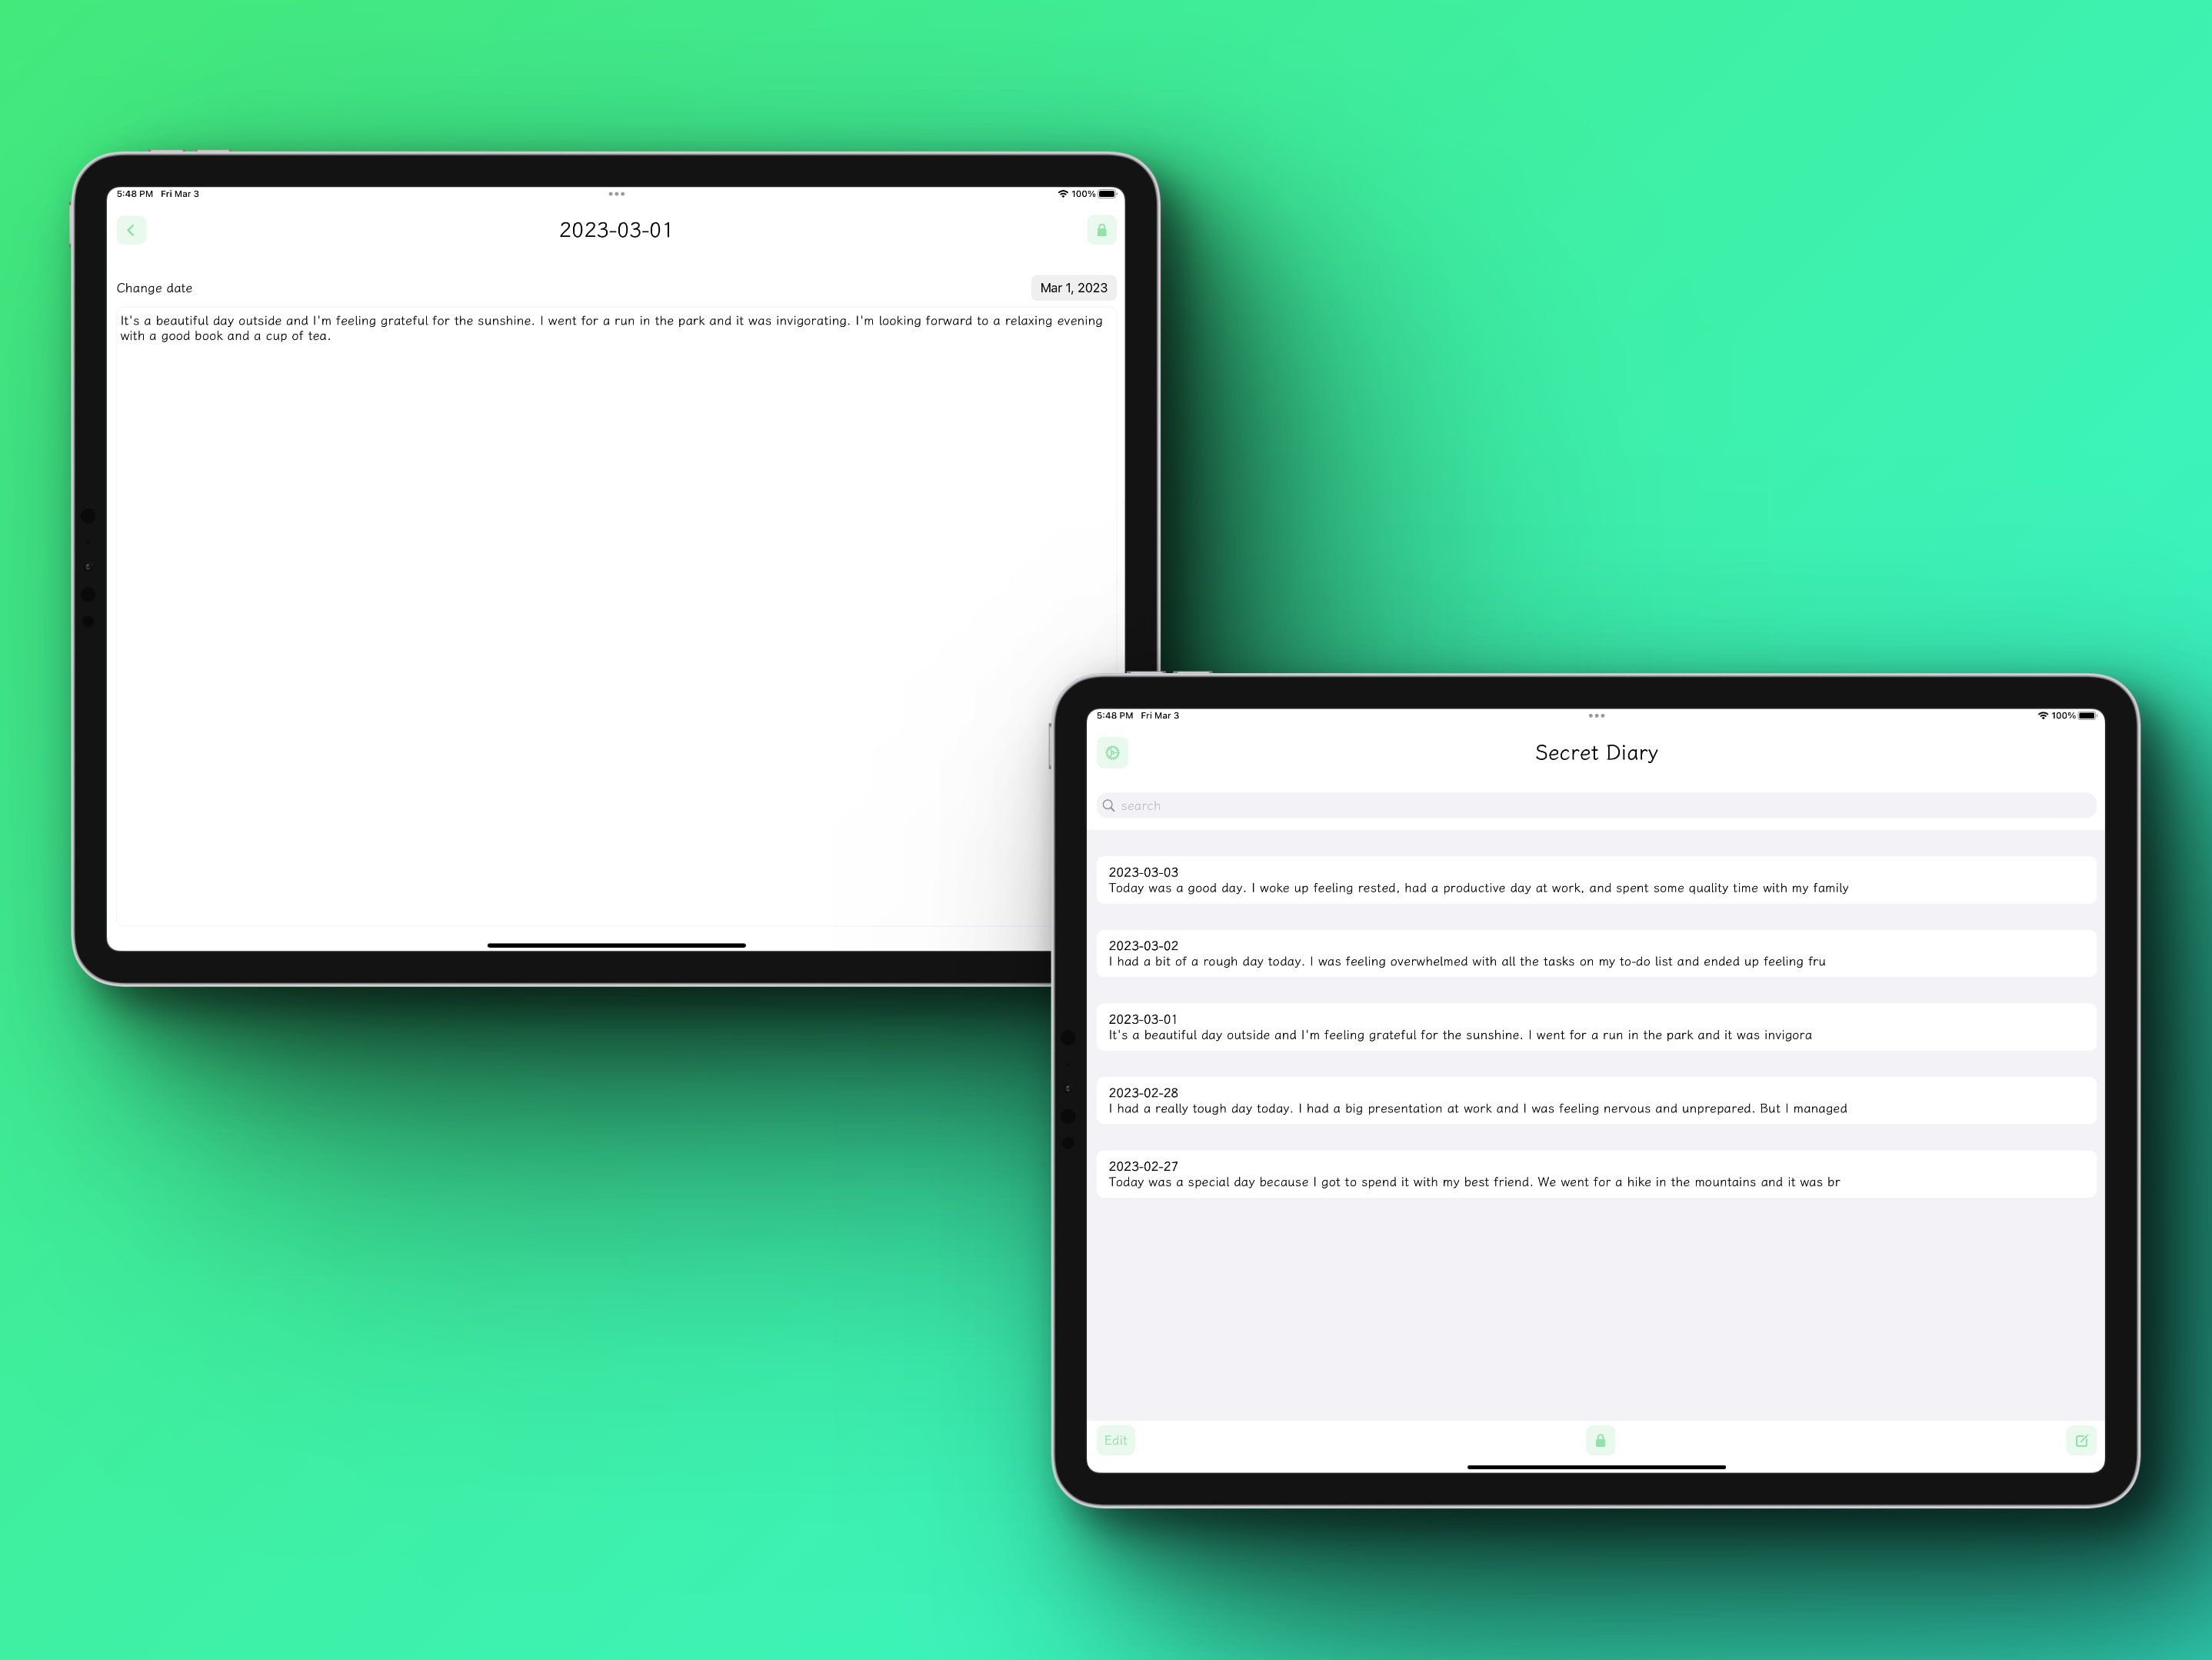
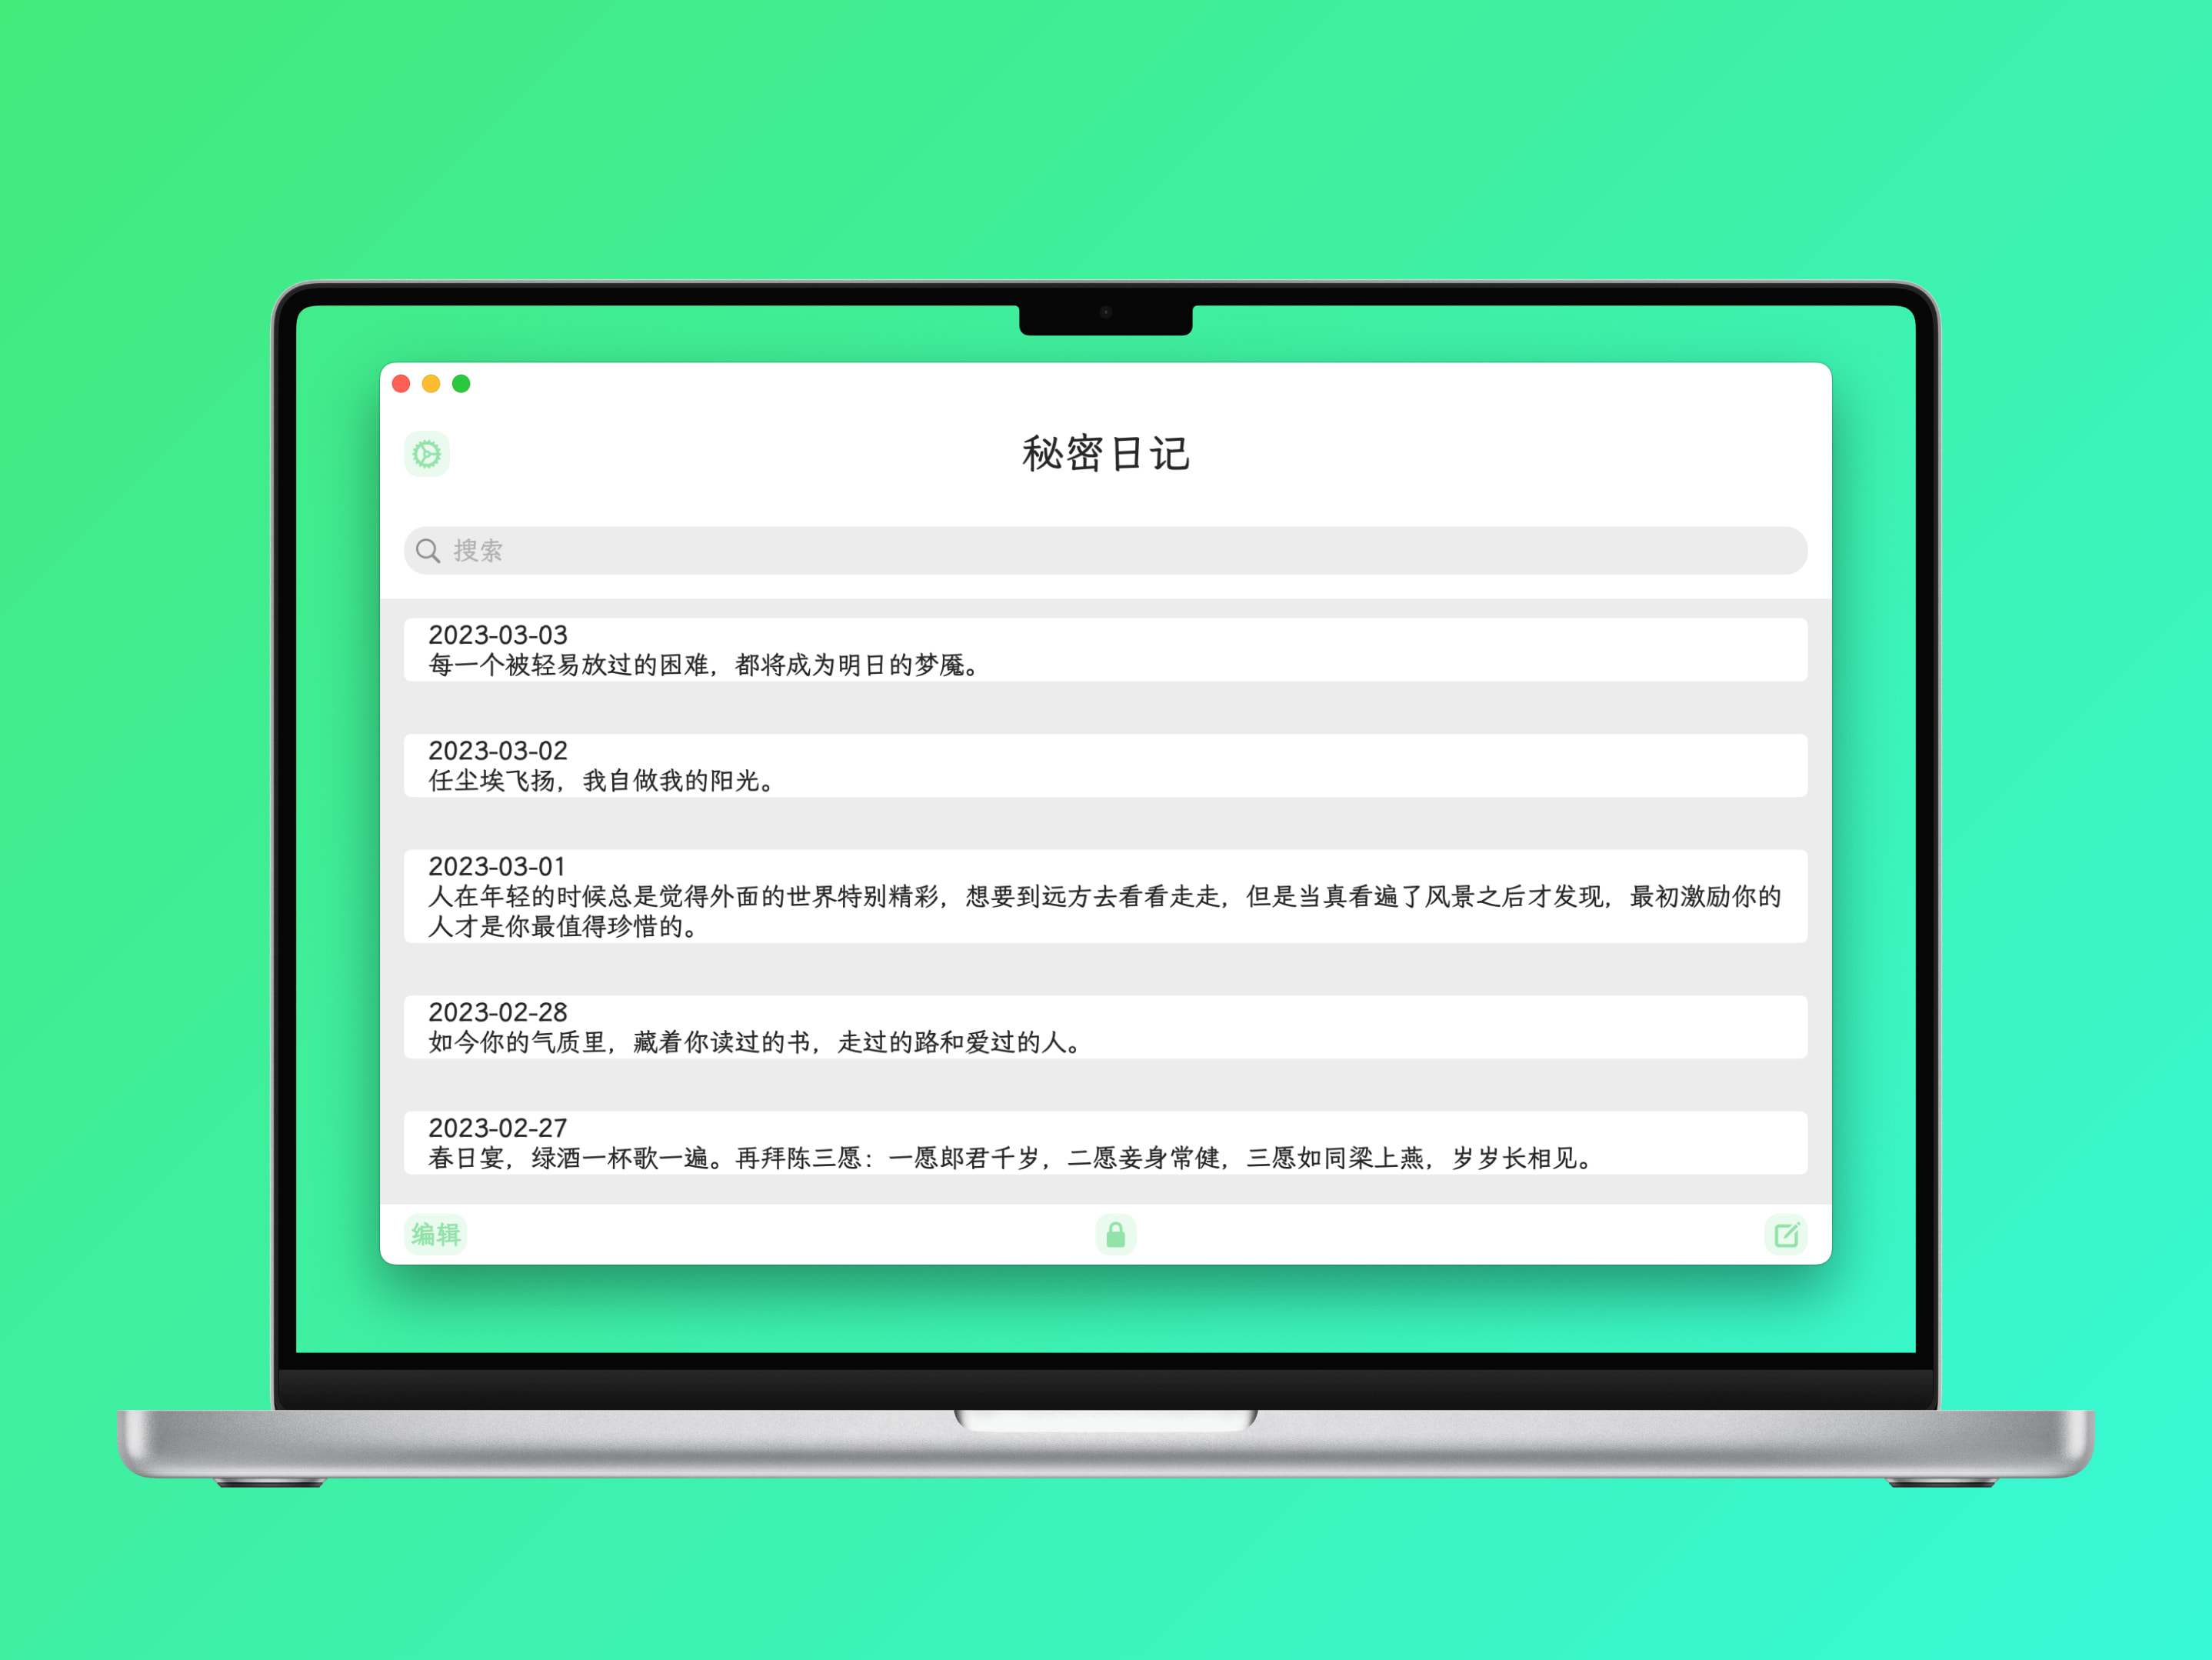
秘密日记是一款专门为用户提供安全保护的日记应用。这款应用能够帮助用户记录日常生活中的点点滴滴,同时还能够保护用户的隐私。
使用秘密日记,您可以设置密码,而非指纹或面容,确保只有您可以访问您的日记。此外,秘密日记还提供多种精美的字体可供选择,帮助您将日记记录得更加精美和个性化。
秘密日记的界面简洁明了,易于使用。您可以根据内容对已有的日记进行搜索,方便您快速查找想要的内容。
总的来说,秘密日记是一款简单好用、功能强大的日记应用,它能够帮助您更好地记录生活中的点滴,并保护您的隐私。如果您正在寻找一款安全、易用的日记应用,秘密日记绝对是您的最佳选择。
The Secret Diary is a diary application designed specifically to provide users with secure protection. This application helps users record their daily lives and protects their privacy at the same time.
With the Secret Diary, you can set a password, rather than relying on fingerprints or facial recognition, to ensure that only you can access your diary. In addition, the Secret Diary offers a variety of beautiful fonts for you to choose from, helping you make your diary entries more beautiful and personalized.
The interface of the Secret Diary is clear and easy to use. You can search for existing diary entries based on content, making it easy for you to quickly find what you’re looking for.
Overall, the Secret Diary is a simple and powerful diary application that helps you better record the moments of your life while protecting your privacy. If you’re looking for a safe and user-friendly diary application, the Secret Diary is definitely your best choice.
App Store下载
Download on the App Store
有任何疑问或者建议,可以通过 Email 联系。
If you have any questions or suggestions, you can contact them through Email.
隐私政策Privacy policy
本App不进行任何隐私信息收集或上传。
This App does not collect or upload any private information.
]]>测试Wi-Fi和以太网有多快和可靠?
像Speedtest、Netflix的FAST和DSLReports这样的在线测试会告诉你你的互联网连接总体上有多快,但你的服务提供商的速度不是唯一因素。Wi-Fi本身会大大影响速度、延迟和可靠性。而随着宽带互联网连接速度越来越快,Wi-Fi通常已经成为瓶颈。iPerfman帮助你测试你的Wi-Fi连接速度和波动。
性能测试是如何进行的?
你需要一台电脑来运行它,用网线连接到你的家庭网络的路由器上。最好是运行软路由器,这样路由器传输数据,最接近真实互联网模式。
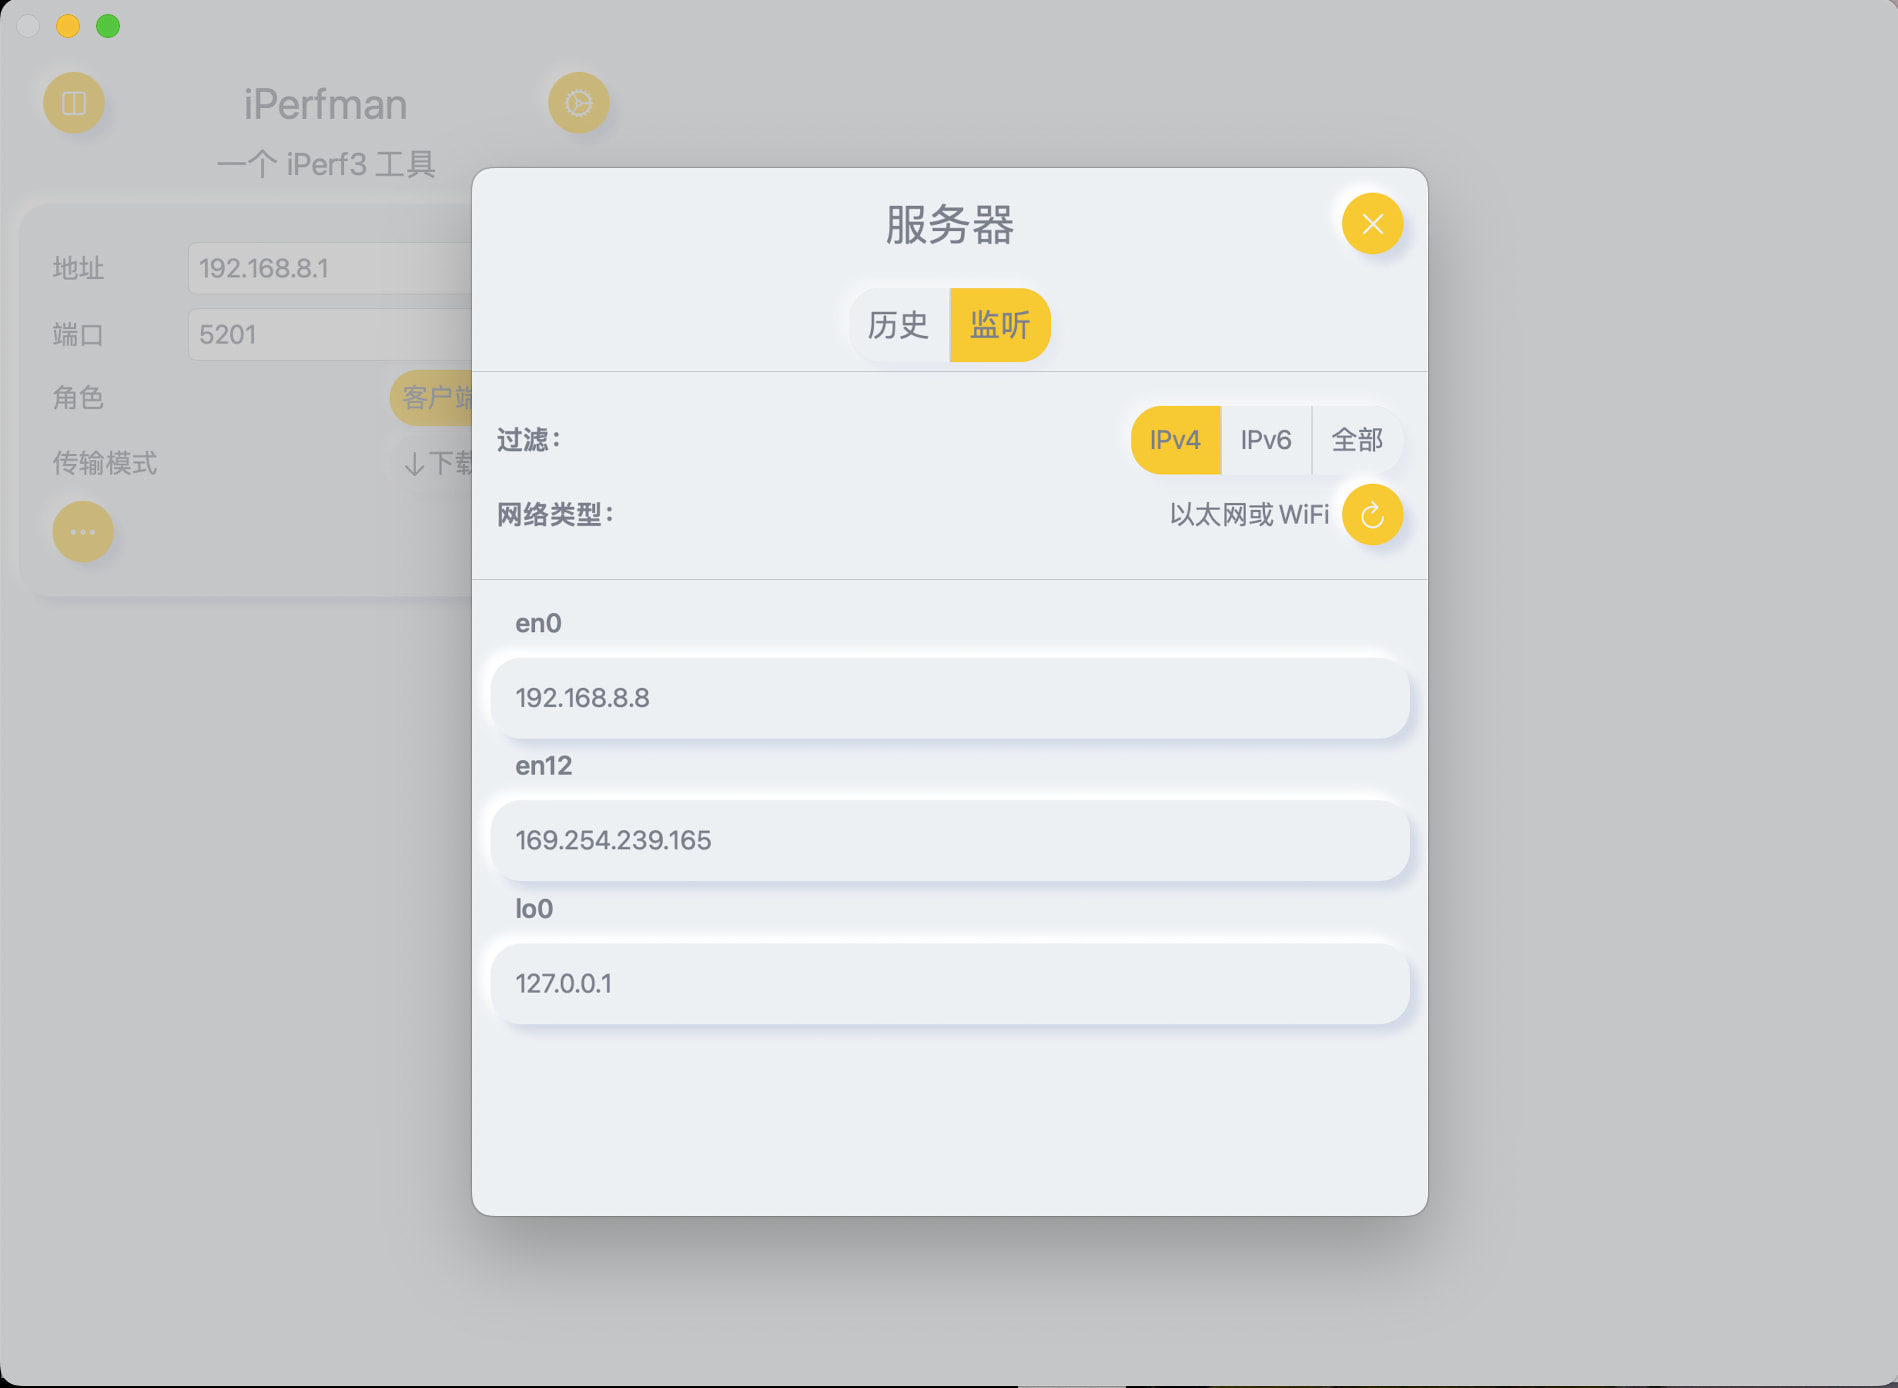
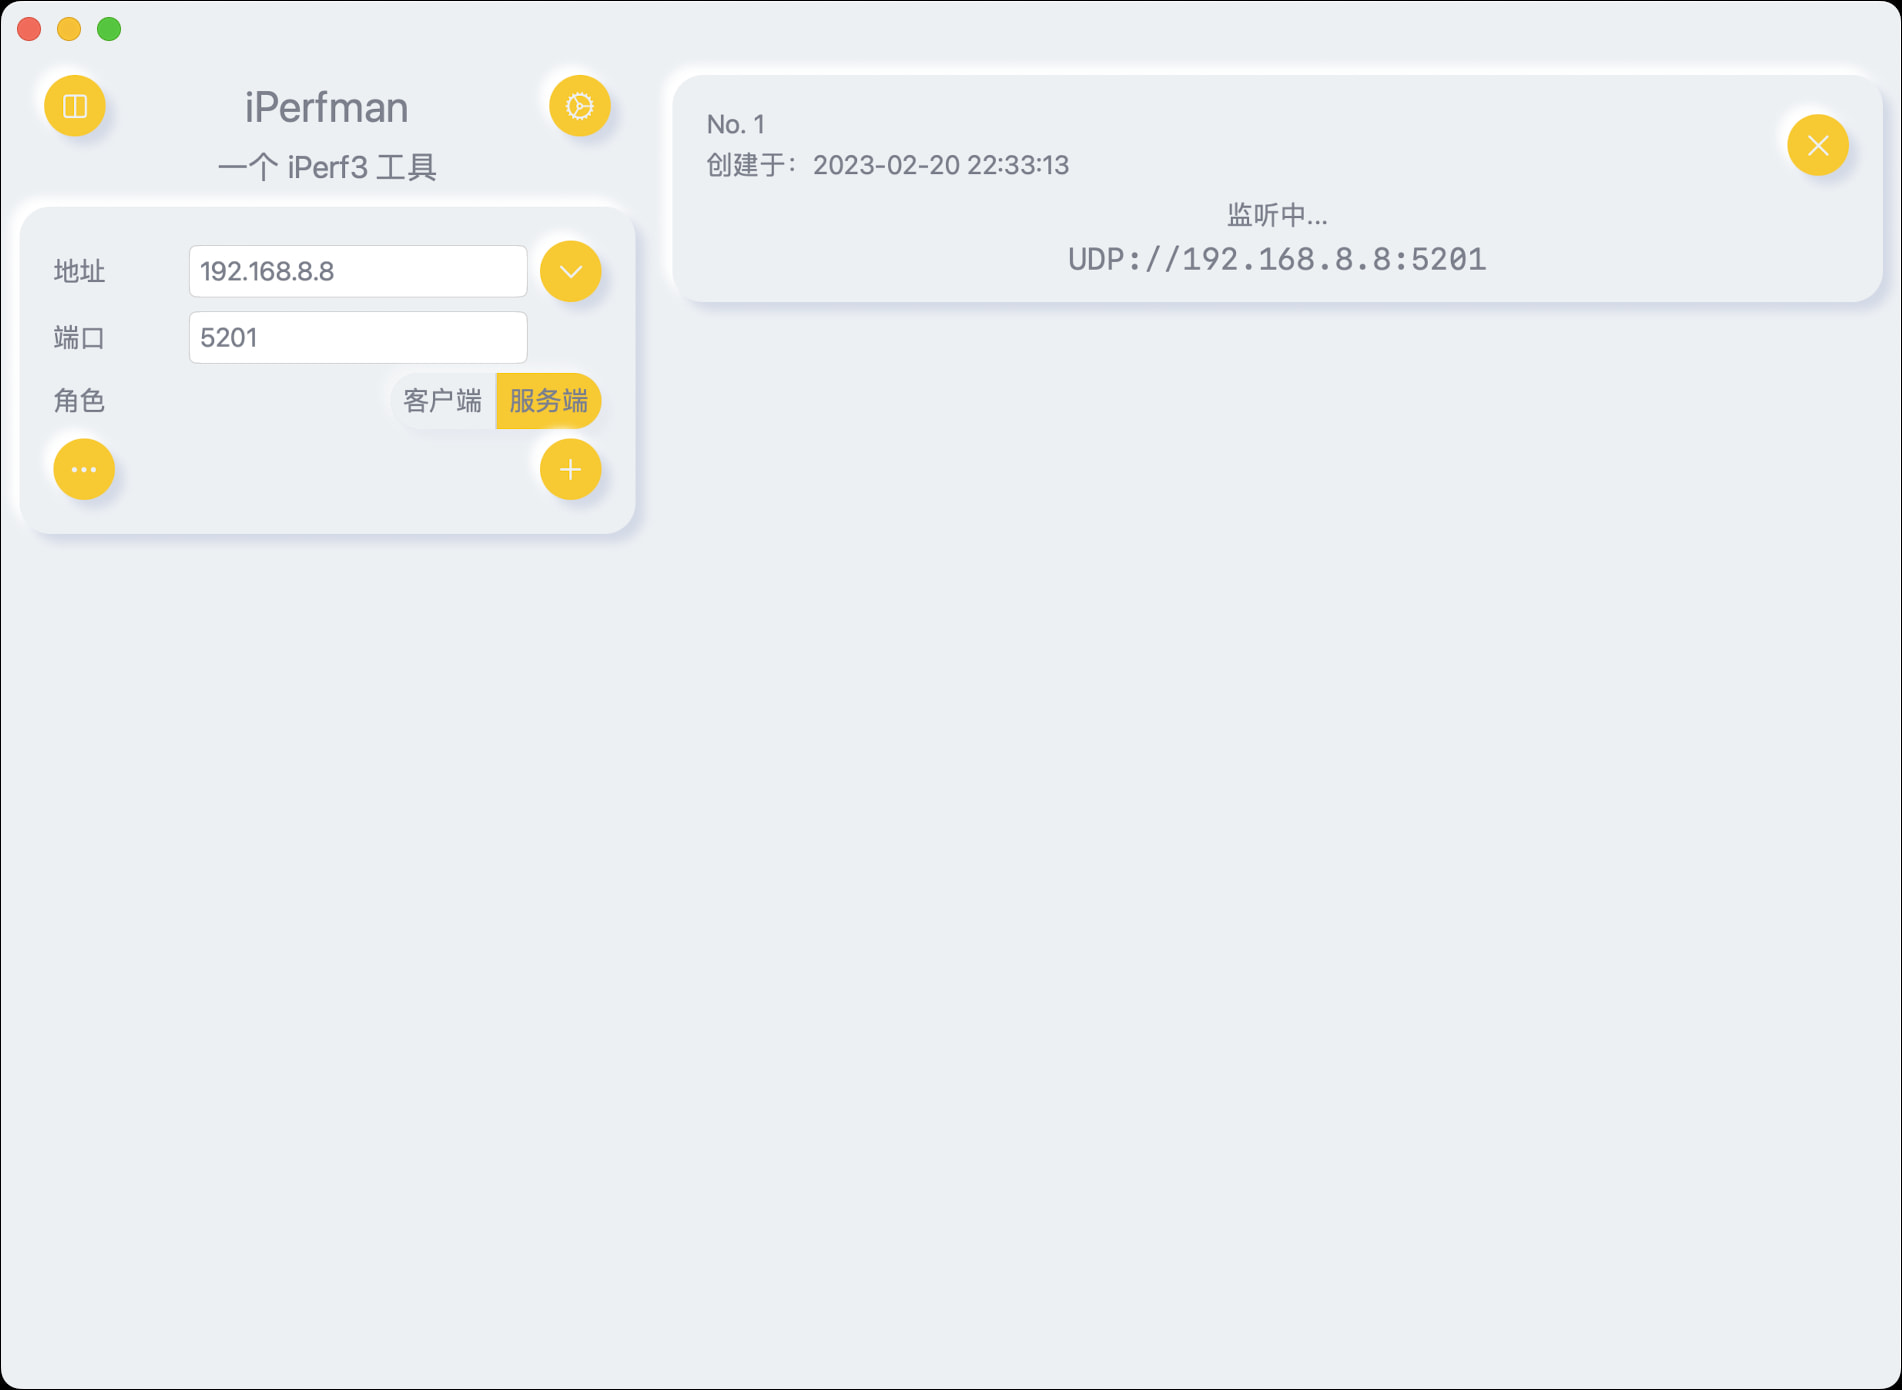
第一步
你需要在macOS安装iPerfman,打开监听,找到局域网IP地址,如192.168.8.8,设为服务端,点击开始。
第二步
你需要在iPhone或者iPad上运行iPerfman,地址填写第一步设置的局域网IP地址,如192.168.8.8,设为客户端,点击开始。
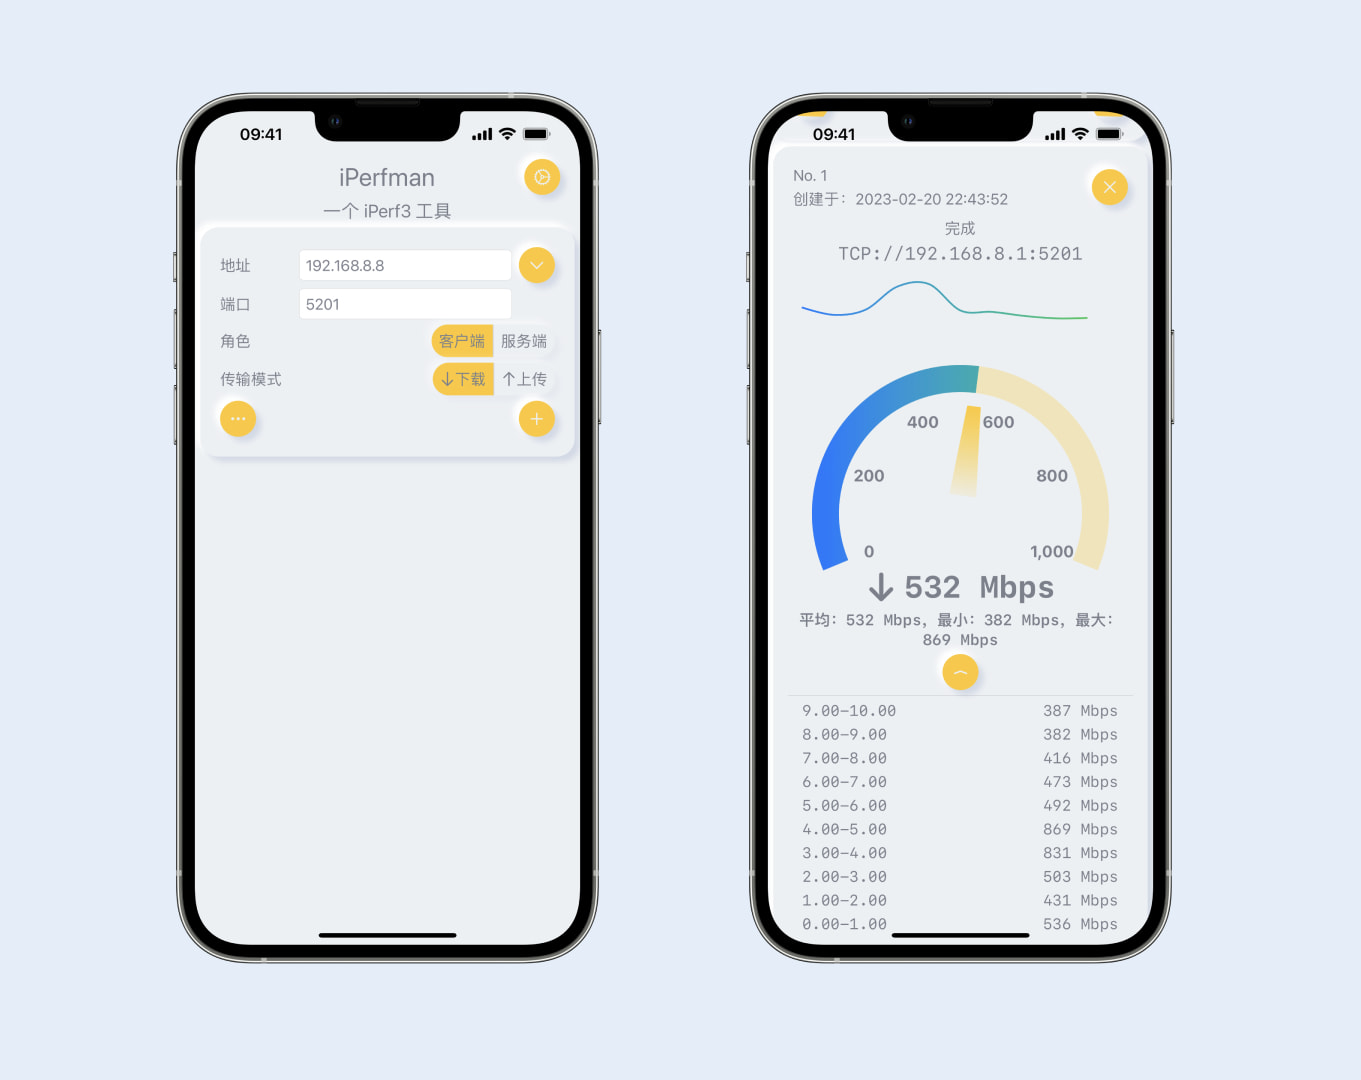
很快测试完成,我们就得到测试结果了。这里我们可以分别测试下载和上传两个模式。这里只是简单例子。你可以测试任意两台设备,不管局域网还是万维网,IPv4还是IPv6。
关于在macOS上安装iPerf 3需要熟悉命令行和安装Homebrew。
在Linux和Windows上,请参考iperf.fr网站。
分析测试结果
主要分析平均速度和波动图。
可以从以下方面优化网速:路由器位置、WiFi连接5G或6G、避免隔墙,有条件网线连接每个房间。
更多参数
客户端参数
协议
不同应用场景和应用会使用不同网络协议,TCP和UDP是最常见两者,所以有必要分别测试。 UDP可以设置不同速率,以达到限速测试。
流数量 -P, --parallel n
在测试期间应使用多少个并行的数据流,以测试数据并发传输的情况。
结束条件
有两种方式:时长和字节数,只可选其一。
时长 -t, --time n
单位是秒,选择你想运行测试的时间,30秒是获得稳定数据的好时间,但可以随意设置得更高,在家里或办公室周围走走,看看带宽如何变化。
字节数 -n, --bytes n[KMGT]
选择你想运行测试的数据量大小为制定的字节数。
测试可以在任何时候停止,所以可以随意设置一个较高的持续时间,在你满意的时候停止。
连接超时 --connect-timeout n
单位是秒,设置建立到服务器的初始控件连接的超时时间。提供一个较短的值可以加快对一个宕机的iPer3服务器的检测。
忽略前N秒 -O, --omit n
单位是秒,执行预测试N秒,省略预测试统计信息,跳过TCP慢启动周期。
零拷贝 -Z, --zerocopy
使用零拷贝(zero copy)的方法发送数据。
服务端参数
保持运行
当作为服务端时,每次其它客户端测试完成后,服务端保持运行。关闭此选项,单次测试结束是,服务端也停止运行。
通用参数
报告间隔 -i, --interval n
定期吞吐量报告之间的秒数
详细日志 -V, --verbose
是否记录详细日志。
身份验证
- 生成公私钥
1 | openssl genrsa -des3 -out private.pem 2048 |
- 生成登录凭证
下面给出在 UNIX/Linux 系统上生成密码散列的命令示例:
1 | S_USER=mario S_PASSWD=rossi |
该文件是一个用逗号分隔的用户名和相应密码哈希的列表。密码哈希是字符串"{$用户名}$密码"的SHA256哈希。
1 | cat credentials.csv |
私钥 --rsa-private-key-path file
RSA 私钥,复制private_not_protected.pem全部内容。
授权用户 --authorized-users-path file
授权用户文件(CSV),用逗号分隔的用户名和密码哈希列表sha256,复制全部内容。
时间偏移阈值 --time-skew-thresholdsecond seconds
在身份验证过程中,服务器和客户端之间的时间偏移阈值(秒)。
公钥 --rsa-public-key-path file
RSA 公钥,复制public.pem全部内容。
用户名 --username username
授权用户文件中记录的用户名。
密码
授权用户文件中记录的原始密码,非哈希列表sha256。
如果对iPerf3有不清楚的,可以参考iPerf3 用户手册
该应用程序目前使用的是iPerf v3.13代码,使用不同版本的服务器也能正常工作。
仍需帮助?
应用使用有任何问题或建议,欢迎邮件联系:531sunlight@gmail.com。最好附带应用截图和相关环境情况。
]]>